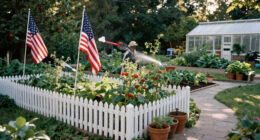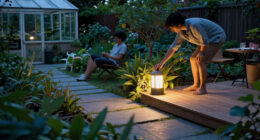


Set up outdoor smart lights that illuminate selected areas and respond to app controls, schedules, or motion settings. This guide is for homeowners and renters with permission to make the installation who can use basic hand tools; it covers low-voltage plug-in systems and smart bulbs in existing outdoor fixtures. Allow 2-4 hours, depending on the size of the area and whether you need to improve your Wi-Fi coverage.

Get garden gear delivered free with Prime
- Fast, free delivery on millions of items
- Prime Video, Amazon Music and more included
- Member-only deals all year

Govee Permanent Outdoor Lights 2 Pro, 200 ft
- ✔ Length: 200 ft
- ✔ Color: Multicolor, customizable dual-zone effects
- ✔ White-light range: 1000K–10000K

Govee Permanent Outdoor Lights Pro, 200 ft, 120 RGBIC LEDs
- ✔ Length: 200 ft (60 m)
- ✔ LEDs: 120 RGBIC
- ✔ Colors and scenes: 16 million colors; 75 scene modes

Govee Permanent Outdoor Lights 2, 100 ft RGBIC Smart Lights
- ✔ Length: 100 ft
- ✔ Lighting: RGBIC; 16 million colors; 100 scene modes
- ✔ White brightness: 45 lumens
Difficulty: Beginner | Time: 2-4 hours
What You’ll Need
Tools & Materials:
- Outdoor-rated smart lights or low-voltage smart lighting kit
- Outdoor-rated power supply or transformer supplied for the system
- Smartphone with the manufacturer’s app installed
- Tape measure and garden stakes or removable markers
- Screwdriver and any mounting hardware specified by the manufacturer
- Outdoor-rated extension cord only if the product instructions allow one
Knowledge:
- Basic use of a smartphone app and home Wi-Fi
- Ability to identify an outdoor outlet and follow product mounting instructions
Check the product label for outdoor use, voltage, temperature range, and required transformer. Use only components designed to work together. If the installation requires new wiring, changes to mains-voltage fixtures, or work in a wet electrical box, hire a qualified electrician. Check local rules and get the property owner’s permission before drilling or burying cable.
Govee Permanent Outdoor Lights 2 Pro, 200 ft
The Permanent Outdoor Lights 2 Pro is the most adaptable choice in this group for a complex or changing roofline. Its cut-or-extend design and snap-fit connectors can make it easier to shape coverage around different eave layouts than the fixed 100 ft Lights 2. Dual-zone colors also allow more customized effects, while its 1000K–10000K white-light range gives buyers unusually broad control over the tone of white illumination.That flexibility makes this our top pick, though the listed 40-lumen brightness and corded power mean it should be judged as architectural accent lighting, not a substitute for bright security or task lights. The 200 ft Pro also offers cut-and-splice installation and Matter support, but lists a narrower 2700K–6500K white range. We would choose the 2 Pro when layout flexibility and nuanced white tones matter most, and the 200 ft Pro when its stated smart integrations and more conventional white range better suit the setup. Its plastic construction and required power connection remain practical considerations for either system.
Pros:
- Cut-or-extend design and snap-fit connectors accommodate different roof layouts.
- Dual-zone colors support more customized lighting effects.
- 1000K–10000K range covers very warm through cool white tones.
- Works with app controls, voice assistants, timers, and Matter automations.
Cons:
- Corded electric power limits placement to locations that can be wired to a suitable supply.
- Plastic construction may not suit buyers looking for metal light housings.
Best for: Homeowners with a long or irregular roofline who want flexible placement, dual-zone effects, and extensive white-light adjustment.
Not ideal for: Buyers seeking bright functional lighting, wireless installation, or a system built from metal components.
Bottom line: For a permanent roofline system that needs adaptable installation and extensive color control, the 2 Pro offers the strongest overall mix in this lineup.
“For a permanent roofline system that needs adaptable installation and extensive color control, the 2 Pro offers the strongest overall mix in this lineup.”
Govee Permanent Outdoor Lights Pro, 200 ft, 120 RGBIC LEDs
For buyers who want a long run with familiar smart home controls, the 200 ft Permanent Outdoor Lights Pro makes the clearest case in this lineup. It supports Matter, Alexa, and Google Assistant, along with app scheduling and dimming, and it offers adjustable white light from 2700K to 6500K. Compared with the 100 ft Lights 2, it covers more distance and can be cut and spliced according to the manual, so a larger property need not be planned around one fixed, uncuttable run.Its practical boundaries are easy to overlook: the adapter is intended for indoor use, so outdoor power needs a covered GFCI receptacle and weatherproof enclosure. Installation also calls for positioning the lights 2–4 inches from the wall. The 2 Pro is more adaptable in its listed connector design and has a broader white range, while this Pro remains a compelling choice for buyers who specifically value its Matter support and stated 120 RGBIC LEDs. It is not compatible for splicing with the 100 ft or 150 ft Pro versions or certain accessories, so plan around this exact kit.
Pros:
- Matter, Alexa, and Google Assistant support broaden smart home control options.
- Cut-and-splice installation can adapt the run to a specific layout.
- Adjustable 2700K–6500K white light complements multicolor scenes.
- Includes adhesive and clips for mounting.
Cons:
- Adapter is intended for indoor use; outdoor installation needs protected power and enclosure.
- Cannot be spliced with the 100 ft or 150 ft Pro versions or certain accessories.
- Lights must be positioned 2–4 inches from the wall.
Best for: Buyers covering a long roofline who want Matter support, adjustable white light, and cut-and-splice flexibility.
Not ideal for: Anyone who needs a power adapter rated for outdoor placement or expects to mix components from other Pro lengths.
Bottom line: This 200 ft Pro is the better fit when Matter support and a cuttable long run take priority over the 2 Pro’s wider white range and snap-fit design.
“This 200 ft Pro is the better fit when Matter support and a cuttable long run take priority over the 2 Pro’s wider white range and snap-fit design.”
Govee Permanent Outdoor Lights 2, 100 ft RGBIC Smart Lights
The 100 ft Permanent Outdoor Lights 2 suits a buyer whose roofline fits the included length and whose installation plan is settled. It brings 16 million colors, 100 scene modes, timers, app control, and AI-generated lighting effects, with Alexa and Google Assistant support. Its IP67-rated lights are designed for outdoor use, and the included adhesive, clips, screws, and adapter buckles give installers several ways to secure the run.The tradeoff is that this is the least flexible layout in the group: the lights cannot be cut, and the system has limits of nine light segments and four extension cables. That makes it less forgiving than either 200 ft option if the measured run does not match the kit or the roofline has interruptions. For a longer installation, the 200 ft Pro provides more coverage and cut-and-splice flexibility, while the 2 Pro adds cut-or-extend adaptability and broader white tuning. We would pick this model for a straightforward shorter run, provided the required covered GFCI outlet and weatherproof enclosure are available.
Pros:
- 100 scene modes, timers, and AI-generated effects give varied app control.
- Works with Alexa and Google Assistant.
- IP67-rated lights are designed for year-round outdoor installation.
- Includes adhesive, clips, screws, and adapter buckles.
Cons:
- Lights cannot be cut to fit a shorter layout.
- Limited to nine segments and four extension cables.
- Requires a covered Class A GFCI receptacle with a weatherproof enclosure.
Best for: Homeowners with a measured roofline that fits a 100 ft fixed kit and who want app scenes and common voice assistant support.
Not ideal for: Buyers with irregular eaves, uncertain measurements, or a layout that needs the lights cut to fit.
Bottom line: Choose the 100 ft Lights 2 when its fixed length fits your roofline and you prefer a simpler shorter-run setup over the flexibility of the 200 ft kits.
“Choose the 100 ft Lights 2 when its fixed length fits your roofline and you prefer a simpler shorter-run setup over the flexibility of the 200 ft kits.”
As an Amazon Associate we earn from qualifying purchases.
Before You Start
Choose a system that matches how you want to control the lights. Some connect directly to Wi-Fi; others use a hub or bridge that must remain within range of the home router and lights. Confirm the system supports your phone and any smart-home platform you use. Do not assume a light is weatherproof because it is marketed for outdoor use: check the rating and protect plugs, connectors, and the transformer as its instructions specify.
Test placement before mounting or burying cables. Keep lights away from places where they could be struck by a mower, stepped on, or aimed into a neighbor’s windows. Switch off the power before handling connections, and never open or modify a sealed fixture or power supply.
Step-by-Step Instructions
Step 1: Map the areas to light
Walk the area after dark if possible, or sketch the property and mark entrances, steps, paths, seating, and dark corners. Choose which spots need steady illumination and which could use motion-triggered light. Measure the approximate cable route from the outlet to each planned light, allowing extra length for bends and connections. Keep the layout within the system’s stated cable and light limits.
Tip: Use lower-level, shielded lighting for paths and gardens. Point beams toward the ground or the feature being lit to reduce glare.
Check: Your sketch shows each light position, the cable path, and the location of the outlet, transformer, or hub.
Step 2: Check power, signal, and product limits
Read the system instructions and verify that the outlet is suitable, the planned number of lights and cable length are within specification, and the transformer can support the load. Check that the hub or lights can reach the router from their planned positions. If the app offers a signal check, run it at the planned control-unit location.
Tip: Do not overload an outlet or connect a power supply to an indoor-only extension lead outdoors. Use a properly protected outdoor outlet and follow the manufacturer’s placement rules.
Check: The planned layout fits the system’s power and cable limits, and the control connection reaches the installation area.
Step 3: Lay out and test the lights
Place the lights at the marked spots and loosely route the cables along the planned path without burying or permanently fixing them. Connect the system in the order shown in its manual, then plug it in or power it on. Use the app or physical control to turn each light on and off. Adjust spacing and direction until paths and features are lit without shining directly into eyes or windows.
Tip: Keep connectors accessible while testing. Do not force plugs together; align their marks and use only compatible connectors.
Check: Every light turns on, and the temporary arrangement gives the coverage you want.
Step 4: Secure lights and route cables
Disconnect power before securing the installation. Mount or stake each light with the supplied hardware, keeping it stable and aimed as tested. Route cables where they will not create a trip hazard or sit in standing water. Bury cable only if the product is rated for direct burial and the manual gives a suitable depth; otherwise, use an approved protected route. Place connectors and the transformer in the locations and orientations specified by the manufacturer.
Tip: Avoid tight bends, pinched cable, and staples or fasteners that could pierce insulation. Leave access to parts that may need service.
Check: Lights are firmly placed, cables are protected from ordinary foot traffic and yard work, and connections remain accessible.
Step 5: Pair the system with the app
Restore power and open the manufacturer’s app. Create or sign in to an account if required, then follow the app’s steps to add the lights, bridge, or controller. Connect to the required Wi-Fi band and grant only the phone permissions the setup process requests. Name each light according to its location, such as “Front Path” or “Patio Steps.”
Tip: Many devices use 2.4 GHz Wi-Fi for setup. If pairing fails, check the product’s network requirements and temporarily move the phone or hub closer to the router.
Check: The app lists the system and lets you control each named light independently.
Step 6: Set scenes, schedules, and motion
Create a basic scene, such as “Evening,” with comfortable brightness and the lights you want active. Set a schedule based on local sunset or a fixed time, if supported. Configure motion sensitivity, activation times, and shutoff duration for motion lights; test these settings from the actual approach direction. Keep essential entry lighting usable from a wall switch or manual app control.
Tip: Start with moderate brightness and a short motion timeout. Increase either only if the area remains too dim or lights switch off too soon.
Check: The scene activates as intended, and motion lights respond to a person approaching without staying on unnecessarily.
Step 7: Run a final nighttime check
After dark, walk each route and test the app, schedule, and motion response. Look for dark gaps, glare, false triggers from passing traffic, and light spilling beyond the property. Adjust aim, brightness, spacing, or sensor direction as needed. Check the app for offline devices and inspect visible cable runs and connections once more.
Tip: A daytime test cannot show glare and dark gaps reliably. Recheck after the first rain or temperature change if the system’s instructions recommend inspection.
Check: The intended areas are visible, controls work from the places you use them, and no light causes distracting glare.
Common Mistakes to Avoid
- Buying lights that do not match the outlet, transformer, or system voltage. — Check voltage, load, connector type, and compatibility in the product manual before purchase or connection.
- Burying cables or leaving connectors exposed when they are not rated for those conditions. — Follow the cable and connector ratings; use a protected route where direct burial is not approved.
- Mounting lights before checking their nighttime aim and coverage. — Test the full layout temporarily after dark, then secure the lights once glare and gaps are corrected.
- Assuming Wi-Fi reaches the garden because it works indoors near a window. — Check signal at the planned hub or light location before final mounting; reposition the bridge or improve coverage if needed.
Troubleshooting
Problem: A light does not turn on.
Solution: Check that power is on, the transformer is connected as specified, and the light’s connectors are fully aligned. Test the light in a known working port or cable position. Replace only with compatible parts.
Problem: The app cannot find or pair with the lights.
Solution: Confirm Bluetooth and required phone permissions are enabled, use the Wi-Fi band specified by the manufacturer, and move the phone and hub closer to the router during pairing. Restart the device using the manual’s reset procedure if it remains undiscoverable.
Problem: Lights frequently go offline.
Solution: Check Wi-Fi signal at the controller, verify the router has not changed its network name or password, and move the bridge to a more central location. Update firmware through the app if an update is offered.
Problem: Motion lights trigger too often or miss people.
Solution: Aim the sensor toward the approach path, reduce its view of roads or moving branches, and adjust sensitivity and timeout in small increments. Retest from the normal walking direction.
What Success Looks Like
The installation is complete when every light is securely placed and weather-suitable, the cables and power components follow their ratings, and each light responds reliably through its intended control. At night, paths and entrances should be easy to see without harsh glare or unwanted spill. Scheduled and motion settings should behave as configured.
Next Steps
Save the app login and product manuals, and record any system-specific reset steps. Inspect visible cables, mounts, and connectors periodically and after severe weather. Clean fixtures according to their instructions, remove leaves or soil from sensors, and review schedules when sunset times or household routines change. Add lights only after confirming that the transformer, cable length, and controller support the expansion.
Frequently Asked Questions
Do outdoor smart lights need Wi-Fi?
Some connect directly to Wi-Fi, while others communicate through a hub or bridge. Check the product’s control method and range; a hub-based kit still needs a reliable connection between its hub and router.
Can I install smart bulbs in existing outdoor fixtures?
Yes, if the bulb is rated for outdoor use and compatible with the fixture, enclosure, and control system. Follow the bulb maker’s temperature and enclosure limits, and turn off power before changing a bulb.
Can I leave the lights on all night?
Use the schedule or scene settings to choose steady overnight lighting if the system supports it. Lower brightness or motion activation can reduce glare and power use while keeping entry areas lit when needed.
Can I connect more lights later?
Only if the controller, transformer, and cable run support the added lights and load. Check the system limits before buying additions, and use matching compatible components.