
Set up a greenhouse heater to protect plants from cold while keeping people, plants, and the structure safe. This guide is for beginner greenhouse owners who need to choose a heater, position it, set a thermostat, and check that heating works as intended. Allow 1–3 hours for setup, depending on the heater and power supply, then spend a few minutes checking conditions each day.

Get garden gear delivered free with Prime
- Fast, free delivery on millions of items
- Prime Video, Amazon Music and more included
- Member-only deals all year

Pasapair Greenhouse Heater with Thermostat, 1500W WiFi PTC for Grow Tent
- ✔ Heat output: 1500 watts
- ✔ Heating technology: PTC ceramic
- ✔ Listed coverage: 215 sq. ft.

VEVOR Greenhouse Heater, 1500W Electric Space Heater with Thermostat, Fan & High Heat Modes
- ✔ Heat output: 1500 watts
- ✔ Voltage: 120 volts
- ✔ Current: 12.5 A

Greenhouse Heater with Thermostat, Auto Power Control with Digital Temperature Display
- ✔ Heat output: 1500 watts
- ✔ Current: 15 A thermostat controller
- ✔ Listed coverage: Up to 120 sq. ft.
Difficulty: Beginner | Time: 1–3 hours for setup; 15–30 minutes for daily checks
What You’ll Need
Tools & Materials:
- Greenhouse thermometer with minimum and maximum readings, or a temperature sensor
- Tape measure
- Heater manual and mounting hardware supplied by its manufacturer
- Extension cord only if the manufacturer permits one and it is rated for the heater and location
Knowledge:
- The lowest temperature your plants can tolerate
- How to read the heater’s power, clearance, and installation instructions
- How to identify the greenhouse’s power source and fuel source
Choose a heater rated for greenhouse use and for the local supply voltage. Do not use an indoor space heater, an open-flame device, or a fuel-burning heater unless its manufacturer specifically approves it for greenhouse use. Fuel-burning equipment can produce carbon monoxide, moisture, and combustion gases; install and ventilate it only as its manual directs. Have a qualified electrician handle new circuits, fixed wiring, or any uncertain electrical work.
Pasapair Greenhouse Heater with Thermostat, 1500W WiFi PTC for Grow Tent
For growers who want to manage temperature without walking back to the greenhouse, the Pasapair offers the most developed control package in this group. Its wired external probe measures conditions away from the heater itself, which can make the reading more relevant to plants than relying only on warm air beside the unit. We can set a target from 41°F to 108°F, check the probe through the Smart Life app, and create a weekly schedule for different periods of the day.The controls extend beyond the app: an onboard panel, remote, and wired thermostat provide alternatives, and its four modes include ECO, fan-only, low, and high. That gives it more ways to respond to changing greenhouse needs than the VEVOR’s two heat settings and fan mode. The listed 215-square-foot coverage is also the largest stated figure among these listings, though actual results will depend on enclosure and weather conditions.That breadth comes with setup dependencies. App control requires 2.4 GHz Wi-Fi, and the compact unit still needs a suitable, dry, level location away from water and flammable materials. Buyers who want a simple plug-in thermostat may prefer the SmterCon kit, which avoids app scheduling. Pasapair earns the top spot for growers who will use its probe, scheduling, and multiple controls; its extra features are less compelling if all we need is occasional spot warmth.
Pros:
- Wired probe measures temperature away from the heater
- App supports remote adjustment and a seven-day schedule
- Four operating modes include fan-only and ECO
- Can be controlled through the app, panel, remote, or wired thermostat
Cons:
- App features require a 2.4 GHz Wi-Fi connection
- Coverage claim should not be treated as a guarantee for every greenhouse
- Multiple controls and scheduling add setup complexity
Best for: Greenhouse owners who want remote temperature monitoring, weekly schedules, and several ways to control the heater.
Not ideal for: Buyers who prefer a simple setup, lack compatible 2.4 GHz Wi-Fi, or do not need app-based scheduling.
Bottom line: We recommend Pasapair for growers who will use its external probe and scheduling to manage greenhouse temperatures more deliberately.
“We recommend Pasapair for growers who will use its external probe and scheduling to manage greenhouse temperatures more deliberately.”
VEVOR Greenhouse Heater, 1500W Electric Space Heater with Thermostat, Fan & High Heat Modes
The VEVOR is the more direct choice for growers who want warmth and air movement without building routines in an app. It combines two temperature settings with a fan-only mode, so the same unit can contribute heat in cold weather and circulate air when heating is not needed. A 25° adjustable angle helps direct airflow toward a chosen area, while the handle and stable base make it easier to reposition than a permanently installed heater.Compared with Pasapair, VEVOR gives us fewer control options: there is no listed external probe, Wi-Fi monitoring, or weekly schedule. That simpler feature set may suit a small greenhouse where we can check conditions in person. Its stated temperature range is 40°F to 108°F, and the listing also identifies IPX4 protection and overheat shutoff. Those details add useful context, but they do not mean the heater should be exposed to rain or direct water.VEVOR sits ahead of the SmterCon kit for buyers who value adjustable airflow and a fan-only option in one portable unit. SmterCon instead emphasizes a separate thermostat that switches power automatically, and it states a specific coverage area. VEVOR does not provide a coverage figure here, so we should not assume it suits a larger greenhouse simply because it matches the others’ wattage. Its best role is a portable, uncomplicated heater for a space we can monitor ourselves.
Pros:
- Fan-only mode supports air circulation outside heating periods
- Two heat settings and a stated 40°F to 108°F range
- 25° adjustable angle helps aim the airflow
- Portable handle and stable base support repositioning
Cons:
- No external temperature probe or app control is listed
- No greenhouse coverage area is specified
- Provides fewer operating modes and scheduling features than Pasapair
Best for: Growers who want a portable heater with basic heat settings, fan-only circulation, and an adjustable airflow angle.
Not ideal for: Anyone who needs remote monitoring, a scheduled routine, an external probe, or a stated coverage estimate.
Bottom line: We would choose VEVOR for straightforward portable warmth and airflow when remote monitoring is unnecessary.
“We would choose VEVOR for straightforward portable warmth and airflow when remote monitoring is unnecessary.”
Greenhouse Heater with Thermostat, Auto Power Control with Digital Temperature Display
SmterCon takes a pared-back approach to automation: the kit pairs a 1500W heater with a separate digital thermostat that monitors temperature and switches the heater on or off to reach the chosen setting. For growers who want automatic control without app configuration, that is its clearest advantage. The listing describes a 15A thermostat controller and states coverage up to 120 square feet, making it easier to assess whether the product might fit a modest growing space than VEVOR, which provides no coverage estimate.There is also an adjustable ventilation function for circulation, giving the kit more seasonal flexibility than a heater with heat settings alone. Its stated 1500W output matches Pasapair and VEVOR, but it does not list a wired probe with remote app monitoring, four modes, or a weekly schedule. We should therefore view it as an automatic temperature-maintenance option, not a detailed climate-management system.The main tradeoff is a thinner feature specification. The description says temperature and wind speed are adjustable, but it does not provide a thermostat range, specific fan speeds, or an app connection. Pasapair is the better fit when remote visibility and programming matter; VEVOR gives a clearer description of its portable design and angle adjustment. SmterCon makes most sense when we prioritize an included thermostat controller and basic automatic switching, while accepting that the available information leaves some operating details unanswered.
Pros:
- Includes a digital thermostat for automatic power control
- States coverage up to 120 square feet
- Adjustable ventilation supports air circulation
- Lists overheat protection and fire-resistant materials
Cons:
- No Wi-Fi app, remote monitoring, or weekly schedule is listed
- Thermostat range and specific fan settings are not provided
- Coverage claim may vary with greenhouse conditions
Best for: Growers who want a separate thermostat to switch a heater automatically and need a listed coverage figure for a compact space.
Not ideal for: Buyers who need remote access, weekly programming, a clearly specified thermostat range, or more detailed mode information.
Bottom line: We recommend SmterCon when automatic thermostat switching matters more than app control or detailed programming.
“We recommend SmterCon when automatic thermostat switching matters more than app control or detailed programming.”
As an Amazon Associate we earn from qualifying purchases.
Before You Start
Check the forecast and the temperature range required by your plants before sizing or setting a heater. A heater that is too small may run continuously without protecting plants on the coldest nights. A heater that is too large can cause rapid temperature swings. Check the greenhouse structure for leaks and close doors and vents as appropriate, while keeping any ventilation openings required by the heater clear. Keep water away from electrical connections, and never cover a heater or place flammable materials near it.
Read the full manual before installation. Follow its clearance distances, mounting rules, ventilation requirements, and instructions for damp locations. If the manual conflicts with general guidance, follow the manufacturer’s instructions.
Step-by-Step Instructions
Step 1: Set a target temperature
List the plants you need to protect and find their minimum safe temperatures from reliable growing guidance or plant labels. Set the greenhouse target above the most sensitive plant’s limit, allowing a small margin for sensor variation and cold spots. If the plants have different needs, group the most cold-sensitive plants in a smaller protected area rather than heating the entire greenhouse to a temperature that suits only a few.
Tip: A thermostat setting is not the same as the temperature at every plant. Greenhouses can have colder corners and warmer areas near the heater.
Check: You have a written target temperature and know which plants need the most protection.
Step 2: Choose a suitable heater
Select a heater designed for greenhouse conditions, with a thermostat suited to your target range. Compare its rated heat output with the greenhouse size, insulation, local winter lows, and heat loss through glazing, gaps, and the floor. Use the manufacturer’s sizing guidance or ask a greenhouse supplier to calculate capacity when you are unsure. Check the required voltage, current, fuel, ventilation, and environmental rating before buying or connecting it.
Tip: Do not estimate electrical capacity from the plug shape. Confirm that the circuit can safely carry the heater’s load. Ask an electrician if the circuit rating or condition is unclear.
Check: The heater’s stated use, capacity, power source, and installation requirements match your greenhouse and supply.
Step 3: Prepare the greenhouse
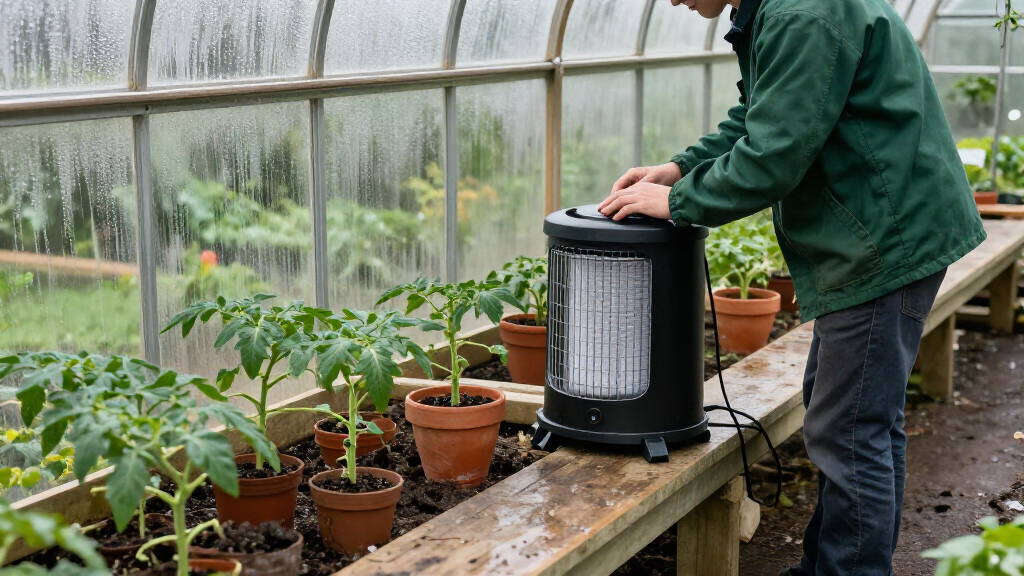
Remove dead leaves, boxes, tools, and other combustible items from the planned heater area. Repair obvious gaps where practical, and check that doors and vents work. Keep the ventilation required by a fuel-burning heater unobstructed. Choose a location with stable footing or a suitable mounting surface, away from water, plant foliage, plastic sheeting, and paths where people may bump the unit.
Tip: Do not block the heater’s air intake or outlet. Do not place it where irrigation spray or condensation can reach its controls or electrical connections.
Check: The planned location is dry, stable, clear of clutter, and meets the manual’s required clearances.
Step 4: Install the heater as directed
Mount or position the heater exactly as its manual specifies. Use only the supplied or approved hardware, keep the stated clearance from walls and plants, and point airflow as directed. Connect it to the specified supply. Avoid daisy-chained extension cords, household timers, or adapters unless the manufacturer explicitly allows them. For fixed wiring, a new circuit, or a connection that needs weather protection, use a qualified electrician.
Tip: Do not run a cord where it can be pinched by a door, submerged, tripped over, or exposed to water. Stop if the plug, cable, outlet, or heater is damaged.
Check: The heater is secure, unobstructed, connected as specified, and all cables and fuel lines are protected as required by the manual.
Step 5: Place the temperature sensor
Put the thermostat sensor or a separate thermometer at plant height, near the plants you are protecting. Keep it out of direct sunlight and away from the heater’s direct airflow, doors, vents, and cold glass. If the heater has a built-in thermostat, use a separate thermometer to check the temperature in the plant area rather than relying only on the heater display.
Tip: A sensor beside the heater may reach its set point before the rest of the greenhouse warms up, leaving plants cold.
Check: The sensor measures the air around the plants rather than a hot or unusually cold spot.
Step 6: Set and test the thermostat
Set the thermostat to the target temperature from Step 1. Switch the heater on and watch it through one heating cycle while you remain nearby. Check that it starts as the greenhouse cools below the set point and stops after the sensor reaches the set point. Check the separate thermometer after the cycle, and adjust the sensor position or setting if the plant area differs from the target.
Tip: Do not leave a newly installed heater unattended until you have checked its operation and confirmed that nearby surfaces and plants are not overheating.
Check: The heater cycles on and off, and the plant-area thermometer reaches a suitable temperature without excessive heat near the unit.
Step 7: Check temperatures during cold weather
Record the minimum and maximum readings each morning during cold spells. Compare the readings with the target for your plants. Look for cold corners, condensation, wilting, or leaf damage, and check that the thermostat and heater have power. Adjust the plant grouping, sensor placement, or set point in small increments, then observe the next heating cycle before making another change.
Tip: If the heater runs constantly or the temperature keeps falling, do not keep raising the thermostat without checking capacity, ventilation, and power supply.
Check: The overnight minimum stays within the plants’ safe range, and daytime temperatures do not climb past their preferred range.
Common Mistakes to Avoid
- Blocking ventilation or placing plants and stored items too close to the unit. — Keep the heater’s intake, outlet, and manual-specified clearance area open at all times.
Troubleshooting
Problem: The heater does not turn on.
Solution: Check the thermostat setting, power switch, plug, and breaker without touching damaged or wet equipment. Consult the manual for reset steps. If the outlet, cable, plug, or heater is hot, scorched, wet, or damaged, disconnect power only if safe and contact a qualified electrician or the manufacturer.
Problem: The greenhouse stays colder than the target.
Solution: Compare the heater display with the separate thermometer at plant height. Confirm that the sensor is positioned correctly, doors are closed, and the heater’s intake and outlet are open. Check the heater’s capacity and the greenhouse for drafts. If it still cannot maintain temperature, consult the manufacturer or a heating professional about sizing and supply.
Problem: The heater switches on and off too often.
Solution: Move the sensor away from direct airflow, sunlight, or a draft, following the manual’s placement instructions. Check for a loose sensor connection and avoid rapid thermostat changes. Contact the manufacturer if cycling continues with the sensor correctly placed.
Problem: Plants near the heater show heat damage or dry out.
Solution: Turn the heater off if plants or nearby materials are overheating. Restore the specified clearance, redirect airflow only if the manual permits it, and check the thermostat reading against a separate thermometer. Water plants according to their needs; do not spray the heater or electrical equipment.
What Success Looks Like
The heater is approved for greenhouse use, installed with the clearances and connections specified in its manual, and cycles under thermostat control. A thermometer placed at plant height records overnight temperatures within the safe range for the plants, with no excessive heat near the unit, damaged cables, blocked ventilation, or fuel odors. For fuel-burning equipment, follow the manual’s ventilation and carbon monoxide safety instructions. Leave the greenhouse and seek help if an alarm sounds or anyone develops headache, dizziness, or nausea.
Next Steps
Keep a simple log of thermostat settings and overnight minimum and maximum temperatures, especially during the first cold spell. Check the heater, cable, plug, mounting, vents, and sensor regularly for damage, dust, blockage, or movement. Clean and service the unit only as its manual directs, with power or fuel shut off as specified. Before each winter, review plant temperature needs, test the heater while you can monitor it, and arrange professional service if it makes unusual noises, smells, or fails to cycle.
Frequently Asked Questions
What temperature should I set a greenhouse heater to?
Set it according to the most cold-sensitive plants you are protecting, using their stated minimum safe temperature as a reference. Place a separate thermometer at plant height and check overnight readings before making small adjustments.
Can I use a household space heater in a greenhouse?
Use one only if its manufacturer specifically approves it for greenhouse conditions, including damp air and the intended mounting location. Many household heaters are not designed for that environment. Check the manual and power requirements before connecting any heater.
Where should I place a greenhouse heater?
Place or mount it according to its manual on a stable, dry site with required clearances from plants, walls, water, and combustible materials. Keep the intake and outlet open, and position the thermostat sensor at plant height away from direct airflow.
Why does my heater run constantly?
The heater may be undersized, the greenhouse may lose heat through gaps, the sensor may be in a cold draft, or the power supply may not match the unit’s requirements. Check sensor placement, doors, vents, and the separate thermometer. Ask the manufacturer or a qualified heating professional if the cause remains unclear.
Can I leave a greenhouse heater running overnight?
Follow the heater manual and local electrical and fire safety requirements. Before relying on overnight operation, monitor a full heating cycle, check the plant-area temperature, and inspect the installation for safe clearance and dry, protected connections. Use only equipment approved for unattended operation if the manufacturer states that it is suitable.