TL;DR

Get garden gear delivered free with Prime
- Fast, free delivery on millions of items
- Prime Video, Amazon Music and more included
- Member-only deals all year
Greenhouse heaters help protect plants from frost and keep conditions within a useful temperature range, but the right choice depends on your greenhouse, crops, climate, and available energy sources. Seal drafts and reduce heat loss before sizing a heater, then use a well-placed thermostat and follow the appliance instructions to manage temperature and safety.
A sunny greenhouse can feel warm at noon and turn bitterly cold by dawn. That fast swing can catch tender seedlings, tropical plants, and even water lines off guard.
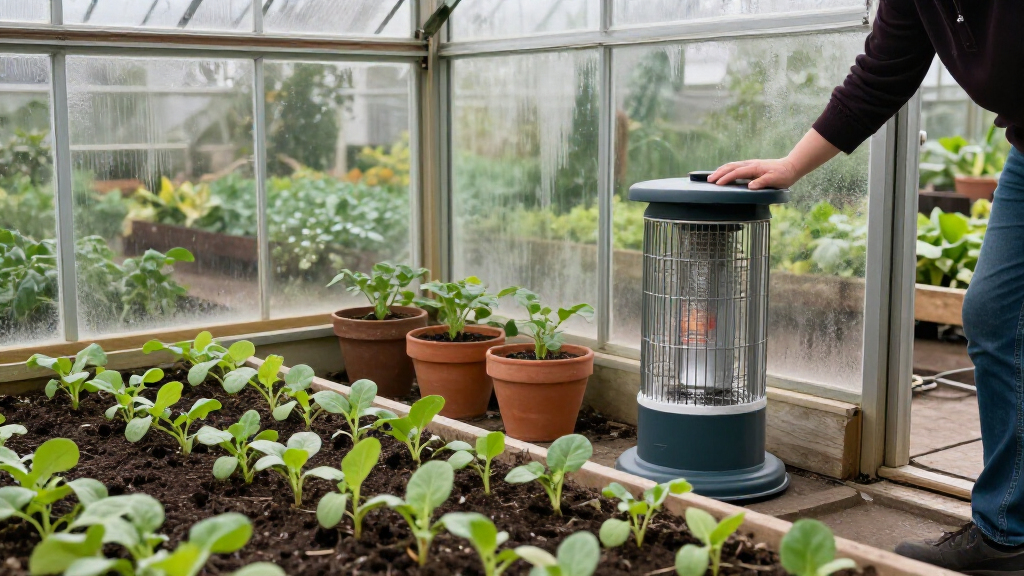
Greenhouse heaters help protect plants from cold, but a heater alone cannot fix heat escaping through gaps or thin glazing. You’ll get better results by matching the heater to your greenhouse, setting temperatures for your crops, and controlling heat loss first.
This guide compares common heater types, explains what sizing depends on, and walks through safer operation. You’ll also see practical ways to lower heat demand, from an insulating night curtain to a thermostat placed near plant height.
Seal drafts and reduce heat loss before increasing heater capacity.
Choose heater type based on greenhouse conditions, crop needs, local energy prices, and available fuel.
Size the heater for the coldest outdoor conditions you need to handle, not greenhouse floor area alone.
Place the thermostat near plant height and check temperatures in more than one location.
Follow appliance instructions for clearance, ventilation, maintenance, and whether unattended operation is allowed.
Keep plants warm by slowing heat loss first
Before choosing a heater, reduce the heat your greenhouse loses overnight. Greenhouse heaters help protect plants from cold, but their running costs rise when warm air escapes through gaps, thin glazing, or an uncovered doorway. Think of your greenhouse as a leaky bucket: adding more heat helps for a while, while fixing the leaks makes every unit of heat last longer. That distinction matters because a heater’s capacity only helps while it can replace heat as quickly as the structure loses it.
Start by checking door seals, vents, and panel joints on a windy evening. A cold draft at ankle height can chill a tray of seedlings even when the thermostat says the middle of the greenhouse is warm. Air leaks also make conditions less predictable: the heater may cycle more often, and plants beside the leak can experience colder air than the average reading suggests. If you grow tomatoes in one corner and store tools in another, a simple partition or zone can keep you from heating unused space.
Thermal mass can help smooth temperature swings. Several large water containers absorb warmth during sunny hours and release some of it after sunset, though they cannot replace a properly sized heater during a hard freeze. Their benefit depends on how much sunlight reaches them and how much water is exposed to the greenhouse air; on a cloudy winter day, there may be little stored warmth to give back. An energy curtain or suitable insulation can also slow heat loss; a grower with a small glasshouse may find a snug night curtain more useful than buying a larger heater. The tradeoff is that curtains and partitions need to be fitted and used consistently, and must not obstruct ventilation or heater clearances.
- Seal drafts around doors, vents, and glazing.
- Heat only the growing area that needs protection.
- Use thermal mass or a night curtain where the structure allows it.
These steps matter because the useful temperature range is crop-specific. A greenhouse owner overwintering hardy herbs may need less heat than someone raising young peppers, so first identify the coldest temperature your plants can tolerate. Every degree you choose to maintain affects the heater’s workload throughout the coldest hours.
Popular right now
Dyson Car+Boat Cordless Handheld Vacuum

Shark Rotator Lift-Away Upright Vacuum with HEPA Filter (NV501)

Shark Rocket Ultra-Light Corded Stick Vacuum, HV301, Gray/Orange
As an affiliate, we earn on qualifying purchases.
Pick a heater that fits your fuel, space, and routine
The best greenhouse heater is the one that can meet your heat demand safely with the energy you can afford and reliably access. Your choice depends on greenhouse size and insulation, local winter conditions, crops, and available energy sources. An electric heater may suit a small greenhouse with dependable power, while a larger structure might call for a heat pump or a properly installed fuel-burning system. Think beyond the purchase price: installation, fuel availability, maintenance, and whether the system can be left operating as intended all shape the real cost and convenience.
Electric resistance heaters are straightforward to control and produce no combustion gases inside the greenhouse, but electricity prices shape their running cost. Choose equipment rated for its damp environment and follow the electrical installation instructions. A small hobby grower who checks the greenhouse each morning may value simple thermostat control and low installation fuss. Resistance heaters turn electricity into heat directly, which makes them easy to use but means the cost per unit of heat closely follows the electricity rate.
Propane or natural-gas heaters can deliver substantial heat where fuel is available. Vented models send exhaust outdoors; unvented combustion models release water vapor and combustion products into the growing space. Carbon monoxide and other pollutants can harm people or plants if combustion or ventilation is inadequate. The added water vapor may also raise humidity and condense on cold glazing, so the apparent convenience of avoiding a flue comes with air-quality and moisture considerations. Kerosene and paraffin heaters also need careful maintenance and fuel storage, and may be a poor fit for long unattended operation.
Infrared heaters warm plants, soil, and nearby surfaces more directly than the air, so placement and coverage matter. They can be useful when you need targeted warmth, but may leave shaded areas or distant benches cooler than expected. Heat pumps move heat and can use less electricity for a given amount of heat under suitable conditions, though purchase cost and cold-weather capacity matter. Their efficiency advantage depends on outdoor temperature and the system’s capacity; a unit that performs well in mild weather may provide less heat during a severe cold spell. Solar thermal, biomass, and recovered heat can work in particular settings, but reliability and storage vary.
For example, a grower with reliable electricity and a compact greenhouse may prefer an electric unit. Someone heating a larger greenhouse through a cold winter should compare installed heat-pump and vented fuel options with a qualified installer, using local energy costs rather than a generic “cheapest” claim. A comparison should include the coldest conditions the system must handle, not just an average winter day.
Size your heater around the coldest night you expect
Heater size depends on how much heat your greenhouse loses at the coldest outdoor temperature you plan to handle and how warm the inside must stay. Dimensions matter, but so do glazing, insulation, air leakage, and the temperature difference between indoors and outdoors. The bigger that temperature difference, the faster heat generally escapes through the same structure. A heater sized for a mild autumn night may struggle during a sharp winter cold snap.
Start by measuring the greenhouse and deciding on a crop-specific minimum temperature. Look for a reputable sizing tool that accounts for structure and local outdoor conditions; for a large or valuable growing space, ask a qualified installer to calculate the heat load. Avoid choosing by floor area alone. Two greenhouses with the same footprint can have very different needs if one has double glazing and a tight frame while the other leaks air through old panels. A sizing estimate is only as useful as the assumptions behind it, so include planned curtains, partitions, and the coldest outdoor temperature you actually want to withstand.
A unit that is too small can run continuously and still leave plants cold. That can be especially costly if it never catches up during the hours when temperatures are lowest. An oversized unit may switch on and off frequently, making temperatures uneven and potentially wearing controls more quickly. Imagine a narrow greenhouse with a heater at one end: the air beside the unit feels warm, while a tray near the far wall remains chilled. Sizing and placement work together; moving heat through the space can matter as much as adding capacity.
After installation, check conditions in more than one spot with a minimum–maximum thermometer or data logger. If the reading near the heater differs sharply from the far end, adjust circulation or placement and review whether the capacity matches the actual heat loss. Keep notes during cold nights; real readings give you better evidence than a guess based on the mildest week of winter. A log of outdoor and indoor temperatures also helps distinguish an undersized heater from a draft, a poorly placed sensor, or weak air circulation.
Set the thermostat where your plants actually grow
A thermostat controls greenhouse heat well only when its sensor measures the air your plants experience. Place it near plant height, away from the heater’s direct output, cold drafts, and strong sunlight. A sensor mounted beside a heater may shut the unit off while plants at the other end sit in cold air. The thermostat responds to one local reading, so a badly chosen spot can make the entire greenhouse seem warm enough before the coldest plants are protected.
Use the minimum temperatures for the crops and growth stages you have, rather than relying on one setting for every greenhouse. Seedlings, newly rooted cuttings, and mature hardy plants can have different needs. For instance, a grower propagating basil on a bench may keep that small area warmer while allowing a space holding dormant pots to run cooler. Zoning can save energy, but it also creates more places to monitor; a warm reading in one zone does not confirm the conditions in another.
Smart thermostats and remote monitors can send alerts about falling temperatures, power interruptions, or equipment faults. They are useful when you cannot check the greenhouse overnight, but an alert does not warm the space by itself. Test the alarm and keep a backup plan for severe weather, such as moving the most tender plants into a protected area when practical. Remote data is most helpful when you know which sensor it comes from and have checked that it agrees with a thermometer at plant level.
For a simple routine, use these steps:
- Find the crop minimum for the plants and growth stages you are protecting.
- Place the thermostat near plant height, away from direct heat and drafts.
- Check minimum and maximum readings at more than one location during cold weather.
- Adjust the set point or circulation if you find cold spots or large swings.
A grower might discover that the greenhouse reaches its target near the thermostat but dips below it behind a bench. That practical check can catch a problem before frost marks appear on leaves. It also shows whether the next adjustment should be sensor placement, airflow, or a separate zone rather than simply raising the setting for the whole greenhouse.
Avoid fire and air-quality problems around heaters
Safe heater operation depends on the appliance, its installation, and its instructions. Keep heaters clear of plants, plastic, dry leaves, and other combustible materials, and follow the manufacturer’s specified clearances and maintenance schedule. A heater tucked under a shelf may seem space-saving, but dry leaves and plastic pots can sit closer to hot surfaces than you realize. Clear space also allows heat to circulate as intended; crowding a heater can create local hot spots while leaving other parts of the greenhouse cold.
Fuel-burning heaters require special attention to exhaust and ventilation. Unvented combustion releases water vapor and combustion products into the greenhouse; excess moisture can condense on glazing and encourage plant disease, while poor combustion or inadequate ventilation can allow harmful gases to build up. Vented units exhaust gases outdoors, but still need correct installation and care. Never block a required vent or flue. The type of heater changes what you need to manage: venting carries combustion products away, while ventilation for an unvented unit must address what enters the greenhouse air without disrupting safe operation.
Use carbon-monoxide alarms where the appliance instructions or local guidance call for them. Store fuel as directed, keep it away from ignition sources, and do not assume a portable heater is safe to leave unattended overnight. A small greenhouse with a paraffin heater may need regular checks and ventilation, making that setup a poor match for a grower who is away for long stretches. If your routine cannot meet the appliance’s monitoring and maintenance needs, that mismatch is a safety issue as well as an inconvenience.
Choose the appliance for the job, then follow its label and manual. Clearances, ventilation, electrical connections, and maintenance instructions are part of safe operation.
Electrical heaters avoid combustion gases inside the greenhouse, but damp conditions still call for suitable equipment and correctly installed connections. If you are unsure whether a unit is appropriate for a humid space or how it should be installed, ask a qualified professional rather than improvising. Good installation and upkeep reduce the chance that heating creates a new hazard while protecting plants from cold.
Cut winter heating costs with targeted changes
You can often lower greenhouse heating costs by reducing demand before replacing equipment. The savings depend on the greenhouse and local energy prices, so compare your actual energy use and temperature readings over time. A tight door seal may cost little and prevent a steady cold draft, while a heat pump may require a larger upfront investment. The first kind of change reduces how quickly heat escapes; the second changes how heat is supplied. Which pays off sooner depends on the building, weather, and energy rates.
Focus on the area and hours that need warmth. If you raise seedlings on one bench, a suitable partition or zoned system may let you heat that space without warming the entire greenhouse. Set temperatures for the plants you grow, not the most demanding crop you might grow someday. A grower overwintering hardy greens can avoid paying to keep the whole structure at tropical temperatures. Targeted heating can reduce the heated volume, though partitions must still allow any required ventilation and leave safe clearances around appliances.
Energy curtains and insulation can slow heat loss after sunset. Water tanks may store some daytime heat, but their benefit depends on sunlight, tank size, placement, and climate. Heat pumps and hybrid systems have attracted interest as growers look for lower operating costs and less fossil-fuel use, though cold-weather performance and local electricity prices affect the outcome. A curtain reduces the amount of heat the heater must replace, while a heat pump changes the energy needed to supply that heat; the approaches can complement each other but have different costs and installation requirements.
Solar panels can supply electricity to a heater or heat pump, but winter daylight, storage, and system size determine how much of the heating load they can cover. Recovered heat or biomass may suit a farm with a steady source and appropriate handling, yet may be impractical for a small backyard greenhouse. Treat broad technology trends as options to evaluate, not guarantees of savings. A system that produces ample energy at midday still may not meet an overnight heating load unless storage or another reliable source bridges the gap.
Try one measurable change first: seal a draft, add a night curtain, or heat only the bench that needs protection. Then compare overnight temperatures and energy use across similar weather. That gives you a grounded basis for deciding whether a new heater, control system, or insulation upgrade will pay off in your setup. If temperatures improve but energy use does not, you may be maintaining a higher set point or heating a larger area; tracking both measures helps explain the result.
Frequently Asked Questions
What temperature should I keep my greenhouse at overnight?
It depends on the plants and their growth stage. Look up the minimum temperature for your crops; seedlings or tender plants may need more protection than hardy plants you are overwintering.
Can I leave a greenhouse heater on overnight?
That depends on the appliance design, installation, controls, and manufacturer instructions. Do not assume a portable heater is safe to leave unattended; check its manual and make sure required clearances and ventilation are in place.
Do greenhouse heaters need ventilation?
Electric resistance heaters do not produce combustion gases inside the greenhouse. Fuel-burning units may need ventilation or an exhaust flue, and unvented models release combustion products and water vapor into the growing space; follow the appliance instructions and local guidance.
How can I lower greenhouse heating costs?
Seal drafts, use suitable insulation or a night curtain, heat only the area you need, and set temperatures for your actual crops. Track temperatures and energy use so you can see which changes help in your climate.
Will a heater prevent frost damage?
A correctly sized and positioned heater can help protect plants from frost, but cold spots, power failures, and poor sensor placement can still leave plants exposed. Check temperatures at plant level in more than one part of the greenhouse during cold weather.
Are paraffin or kerosene heaters safe for greenhouse plants?
They can be used only with care and according to the appliance instructions. Combustion products, added moisture, ventilation, maintenance, and safe fuel storage all affect whether a particular heater suits your greenhouse and routine.
Conclusion
Choose your greenhouse heater only after you know which plants need protection, how much heat your structure loses, and which energy sources you can use safely. A well-placed thermostat, sealed drafts, and crop-appropriate temperatures can make a modest system more dependable.
On the next cold evening, check the far corner of your greenhouse. The thermometer there may tell you more than the heater’s glowing display.