Spearfishing
Spear Sling: Portable, Powerful, and Perfect for Quick Shots!
A spear sling offers unmatched portability and power for quick shots, making it ideal for fishing and diving adventures—discover its exciting features now!
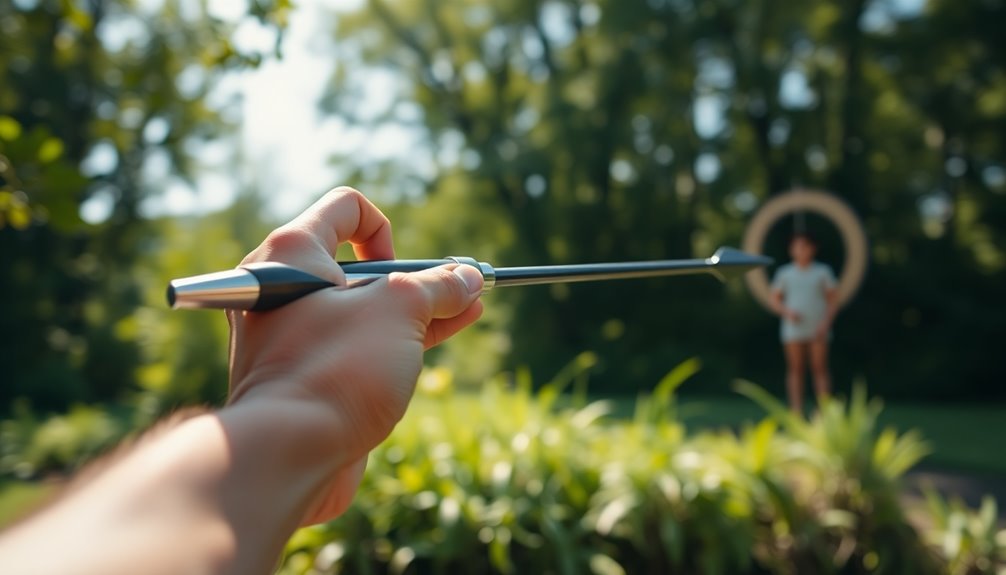
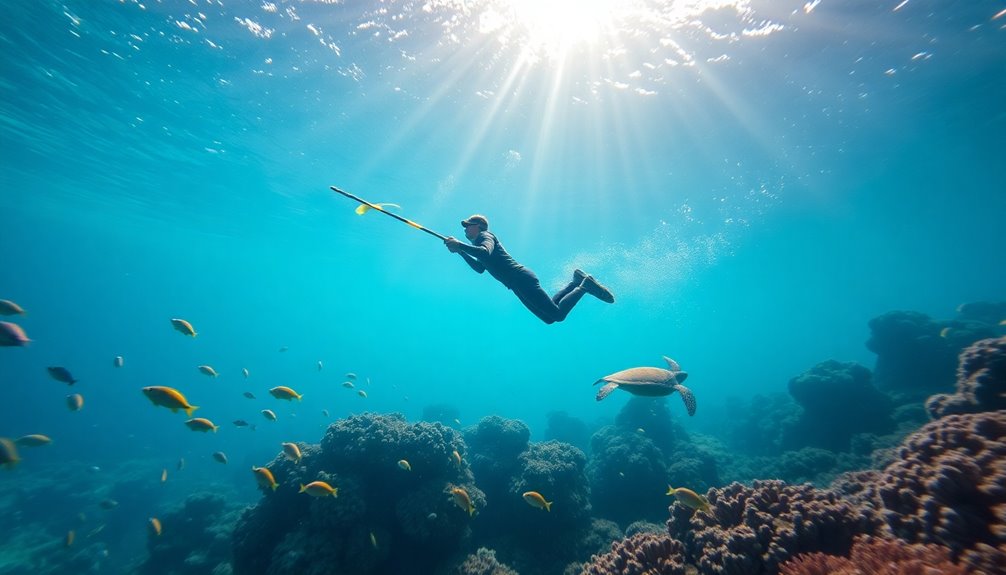
A spear sling's a super cool tool that's portable, powerful, and perfect for quick shots! You'll love how easy it is to use. It's made from strong materials like metal and rubber, giving you durability and speed. Simply pull back the spear, push the handle forward, and let go to send the spear flying! Plus, it works great for catching fish since it can shoot fast and far. Lightweight and easy to carry, you can take it anywhere. Whether you're diving or fishing, this is your go-to for fun. Stick around to discover even more awesome features!
Key Takeaways
- The spear sling's lightweight design enhances portability, making it easy to carry during outdoor activities.
- Its durable materials, like tough metal or fiberglass, ensure long-lasting performance in various conditions.
- The elastic components provide powerful thrusts, allowing for quick and accurate shots underwater.
- The simple two-moving-part mechanism enhances user-friendliness, making it accessible for all skill levels.
- The adjustable power and range capabilities cater to different fishing scenarios, increasing success rates.
Design and Construction Features
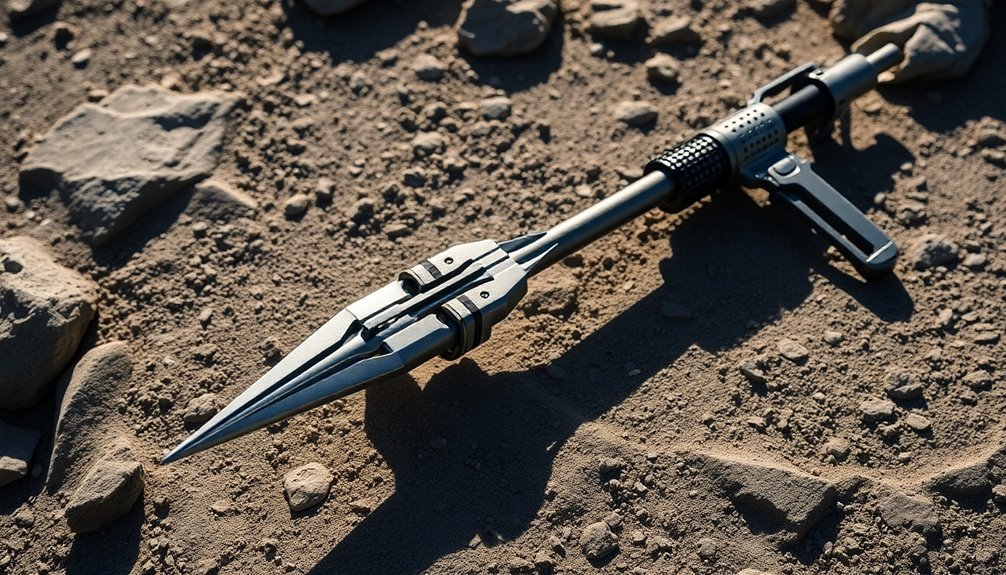
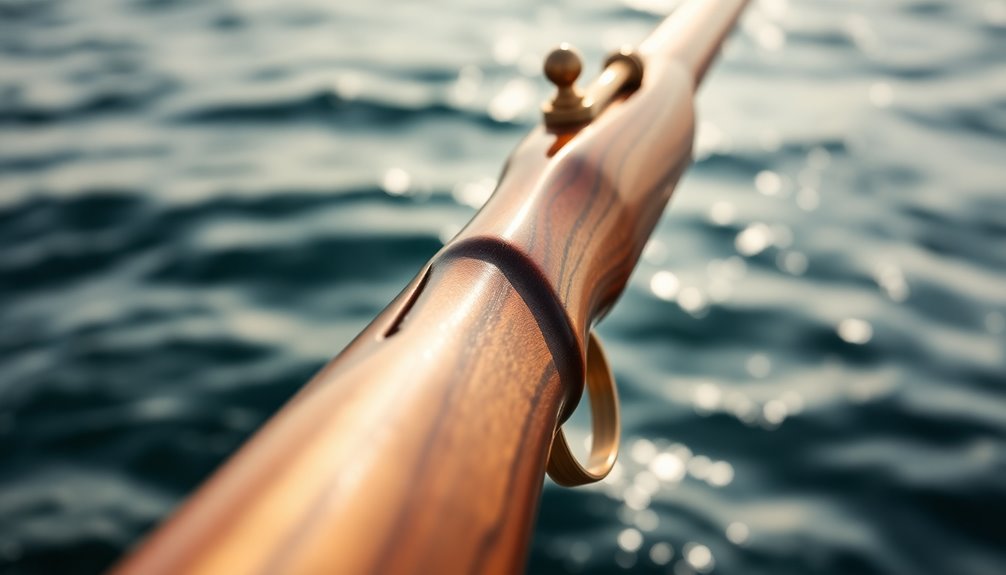
When it comes to design and construction features, the Spear Sling stands out for its innovative approach. You'll notice that the frame is made up of sturdy bar members, giving it strength and stability. This design is often similar to Hawaiian slings, which use a wooden handle or fiberglass rod. The cool part? Many of these frames can be taken apart, making them super portable!
The materials used are important, too. You can find frames made from tough metal or fiberglass, ensuring they last through many adventures. Usually, Hawaiian slings are around five feet long, which is perfect for maneuvering. The design enhancements in the compound spear sling parallel advancements in compound bow technology, providing a modern alternative to traditional spear fishing methods.
One of the most exciting features is the pulley and cam mechanism. The pulleys help stretch elastic materials to provide a mechanical advantage. When you pull back on the sling, the energy builds up, waiting for the perfect moment to launch your spear.
Additionally, the elastic components are strong and durable, often made from stretchy materials like surgical tubing. This design keeps your spear secure until you're ready to release it, making each shot smooth and powerful.
How the Sling Works
The Spear Sling's innovative design not only enhances portability but also plays a key role in its functionality. When you use the sling, you'll notice it works a lot like a bow and arrow. The rubber tubing stores energy, which helps the spear fly faster and farther than you could throw it by hand.
To load the sling, you'll pull the spear back while pushing the handle forward. This stretches the rubber to its maximum length. Make sure to hold it tightly so the spear doesn't slip out! Many users appreciate that the sling features a simple mechanism with only two moving parts, making it user-friendly.
Once you're ready to shoot, simply let go of the spear shaft. The energy from the stretched tubing sends the spear zooming ahead! You can even adjust your accuracy by aligning your arm with the handle.
Remember, smaller spears travel faster but may not hit as hard, while larger spears pack a punch but fly slower.
If you're fishing, you can attach a float line for managing bigger catches. By using light lines and special spear tips, you can enhance your experience even further.
With practice, you'll become a pro at using the Spear Sling!
Historical Significance and Use
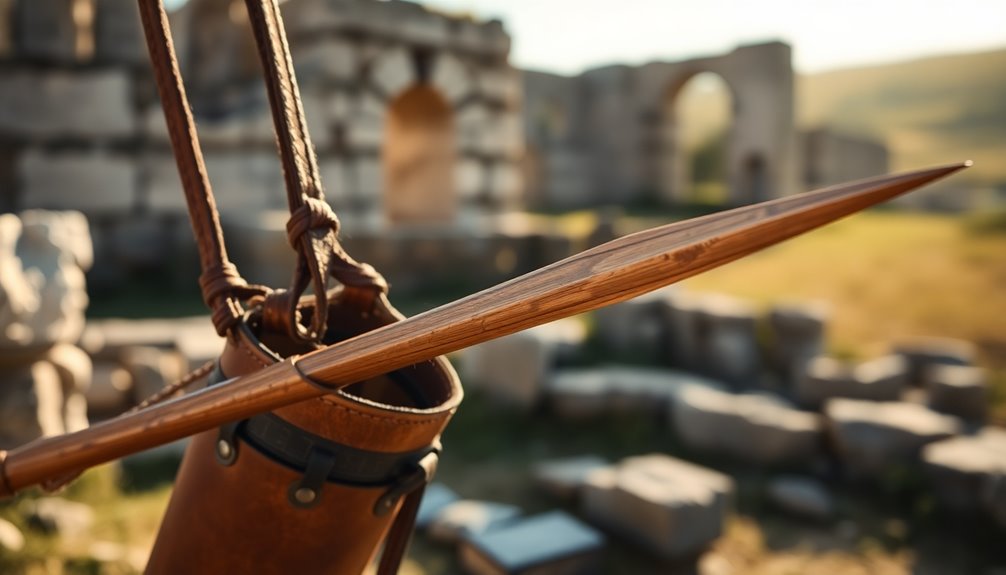
Throughout history, the sling has played a crucial role in various cultures, showcasing its significance as both a weapon and a tool. You mightn't know that the sling dates back to around 10,000 B.C. during the Paleolithic stone age! Ancient civilizations like the Persians, Greeks, and Romans all used slings. In fact, the Balearic Islanders became famous for their sling skills, starting to practice from childhood.
The sling wasn't just a toy—it was a serious weapon! Slinger mercenaries were even hired by powerful armies, like Carthage and Rome. With a range of over 400 meters, slings could shoot lead projectiles that easily penetrated armor. Imagine the surprise of soldiers when these fast, accurate stones flew through the air! Classic slings were often made from non-elastic materials like flax and hemp, enhancing their durability and effectiveness.
You can find slings mentioned in stories like David and Goliath, showing their impact on history. While slingers eventually faded away with the rise of guns and cannons, their legacy lives on.
Today, people still explore slings in activities like wilderness survival and historical reenactments. So, the next time you hear about a sling, remember its exciting past and the role it played in shaping battles and cultures!
Modern Applications and Adaptations
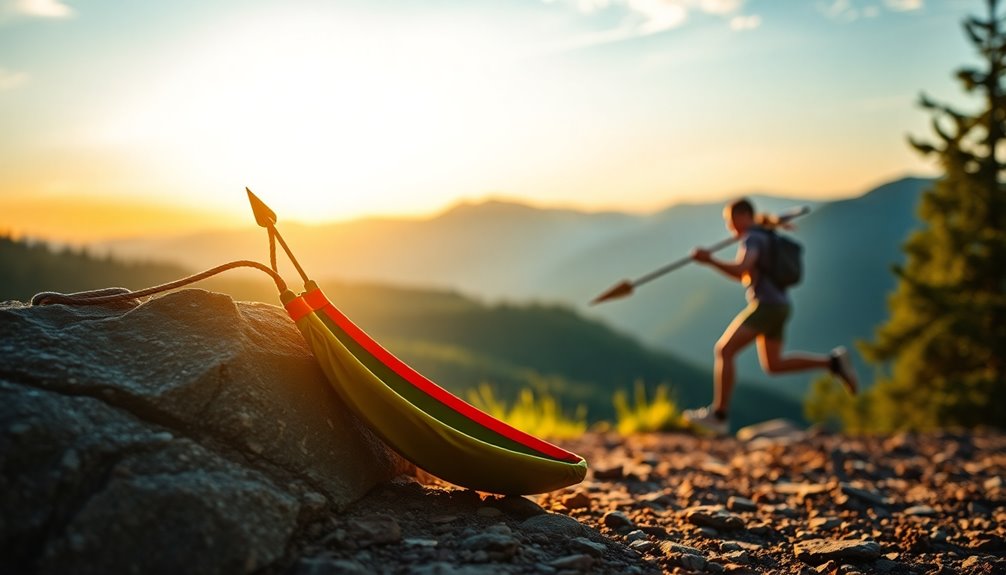
Building on the sling's rich history, modern adaptations have taken this ancient tool and transformed it into a highly effective device for spearfishing. The spear sling now uses elastic materials, like rubber, attached to the spear's butt. This design lets you launch your spear at super-human speed and accuracy, giving you a significant advantage when aiming for fish.
When using a spear sling, you stretch the rubber band to its maximum length before release. This action allows for powerful thrusts and impressive range. You simply grip the handle with one hand and pull back the rubber band with the other. Once you've aimed, you let go, and the shaft flies through the water! Notably, the sling's historical use demonstrates its effectiveness in various ancient military applications, showcasing its enduring utility.
Spear slings are versatile, making them suitable for both beginners and experienced spearfishers. You can swap out shafts to target different fish species, and they're lighter and more aerodynamic than traditional pole spears.
Plus, they allow for quicker shots, so you won't miss that big catch! With some practice, you'll find this tool isn't just fun, but it can also enhance your spearfishing experience, making it more enjoyable and successful.
Tactical Advantages Over Other Weapons
When comparing tactical advantages, a spear sling stands out for its impressive range and versatility. Unlike polespears, which have limited reach, a spear sling can cover great distances. You can adjust the power and range by choosing different spear lengths or diameters. Smaller spears fly faster but pack less punch, while larger ones hit harder but travel slower.
Using a spear sling is easy and stealthy. You don't have to hold it at the ready all the time, so you can quietly approach your target. Plus, you can reload and fire quickly underwater, making it perfect for those who enjoy diving. It even helps you use less oxygen when you're diving deep! Weapon retention is also improved with a spear sling, allowing for better control during high-pressure scenarios.
Another great thing about spear slings is their practicality. They're lightweight and portable, allowing you to carry them everywhere. They're also cheaper to make and maintain than bows or atlatls. You can use rocks or lead as ammunition, which are easy to find.
In combat or hunting, the spear sling shines with its fast fire rate and impressive range. Whether you're protecting your herd or aiming for small game, the spear sling is a powerful tool that's ready to help you succeed!
Frequently Asked Questions
What Types of Projectiles Can Be Used With a Spear Sling?
You can use a variety of projectiles with a spear sling!
Natural stones are great since they're easy to find and can range from small pebbles to larger ones.
Purpose-made clay projectiles work well too, as they're consistent in size and shape, helping with accuracy.
If you want more power and penetration, lead projectiles are a fantastic option.
Each type has its strengths, so choose one that fits your needs best!
How Do I Maintain and Care for My Spear Sling?
To keep your spear sling in great shape, rinse it with fresh water right after using it in the ocean.
Use a soft brush to scrub away salt and dirt.
Disassemble it for a thorough clean and check for any damage, like frays or cracks in the bands.
Lubricate moving parts lightly and store it in a cool, dry spot.
Regularly inspect it, so you're always ready for your next adventure!
Are There Different Styles of Spear Slings Available?
Yes, there are different styles of spear slings!
One popular type is the Hawaiian sling, which uses a rubber band for power and can hold different spear shafts. It's great for targeting fish in tight spots.
Another style is the pole spear, which is longer and less portable.
Each style has its own advantages, like range and control. You can choose the one that fits your needs best for an exciting underwater adventure!
Can Beginners Easily Learn to Use a Spear Sling?
You can definitely learn to use a spear sling, but it takes some practice!
At first, it might feel tricky. You'll need to build muscle memory, and that means spending time practicing every day.
Don't worry! Stretching helps keep your muscles relaxed. Focus on aiming and breathing deeply.
With patience and dedication, you'll see improvements. Remember, mastering it can take time, but the joy of catching fish will make it all worth it!
What Safety Precautions Should I Take When Using a Spear Sling?
When using a spear sling, safety's super important! Always load it in the water and check for tangles. Aim for the fish's head for a humane shot.
Dive with a buddy and keep track of where they are. Remember, never point it at anything you don't want to hit!
After shooting, carefully retrieve your catch and clean your gear. Following these steps ensures a fun and safe experience underwater!
Conclusion
The spear sling is an amazing tool that combines portability and power for quick shots! Its design and history show us how people have used it for ages. Today, it still has a place in modern activities, proving its worth. Whether you're practicing your aim or exploring its history, the spear sling is exciting to discover. So grab one, give it a try, and experience the joy of this unique weapon for yourself!
Spearfishing
Lobster Stick: Harvest Delicious Crustaceans With Ease!
Step into the world of lobster fishing with the lobster stick, and discover the secrets to effortlessly catching these delectable treats!
Using a lobster stick makes harvesting these delicious crustaceans a breeze! This handy tool helps you catch lobsters with ease, especially when you're using traps or pots. You'll want to gather some bait, like oily fish, to set your traps. Remember to follow local fishing rules, like size limits and catch limits. Be sure to check your traps regularly and handle your catch with care. Once you've got your lobsters, you can cook them in many tasty ways, like boiling or grilling. Keep exploring the world of lobster fishing, and you'll discover even more fun techniques and tips!
Key Takeaways
- The Lobster Stick is a specialized tool designed for easily gripping and handling lobsters during harvesting.
- It enhances efficiency by reducing the risk of dropping slippery lobsters while retrieving them from traps.
- Ideal for both commercial and recreational fishermen, it simplifies the process of catching lobsters with safety and comfort.
- Pair it with essential gear like lobster traps and bait for a successful and enjoyable harvesting experience.
- Proper use of the Lobster Stick can lead to quicker processing and less stress on the lobsters, promoting sustainable practices.
Overview of Lobster Fishing Methods
When it comes to catching lobsters, there are several effective methods you can choose from, each suited for different environments and species. One popular method is trawling, mainly used for Norway lobsters and slipper lobsters. You'd drag a net along the sea floor, catching lobsters along with other sea creatures.
If you're interested in catching Caribbean spiny lobsters, gill nets and trammel nets are your go-to options. Gill nets hang vertically in the water, entangling lobsters, while trammel nets have different mesh sizes to catch various sizes. Notably, spiny lobsters are also significant in various tropical fisheries, including the Panulirus argus species.
However, the most common technique is using lobster pots or traps, especially for the American lobster. These pots are baited with fish and placed on the ocean floor. After a day or so, you'd haul them back to see what you've caught!
For those who enjoy a challenge, hand-fishing and spearfishing are great for slipper lobsters hiding in crevices. SCUBA divers often use special tools to catch them.
Each method has its charm, making lobster fishing an exciting adventure!
Essential Equipment for Lobster Harvesting
What essential equipment do you need to effectively harvest lobsters?
First, you'll need lobster traps or pots. These are usually made from strong, coated wire and are about 40 pounds in weight. They come in rectangular shapes, measuring around 3 by 2 feet, depending on local regulations.
You'll also want handling and hauling gear. A hydraulic hauler makes it easier to pull traps from the water, saving you from tiring yourself out. Don't forget bridles and lift lines to secure the traps.
Specialized tools are important too! Banding tools will help you put rubber bands on lobster claws to keep them safe. A V-notch tool is useful for marking female lobsters, ensuring they can continue to breed. Additionally, consider investing in a heavy-duty lobster tool designed for commercial use to enhance your efficiency while harvesting.
Remember to wear heavy-duty gloves to protect your hands from cold water and lobster claws.
Lastly, be mindful of environmental gear. Make sure your traps have biodegradable escape panels to reduce bycatch of undersized lobsters. Following regulations keeps fishing sustainable and fun!
With this equipment, you're all set to enjoy a successful lobster harvesting adventure!
Choosing the Right Bait
You've got traditional options like oily fish carcasses, which include bluefish and mackerel. These are super effective! Salted herring is also a favorite, especially in Maine. It really attracts lobsters. Other fish, like cod and haddock, are good alternatives too.
If you want to try something new, consider manufactured baits. They're made from fresh and processed fish, and studies show they work just as well as traditional baits. Plus, they help protect our oceans by reducing the need for fresh fish.
When you're getting ready, store your bait in a dedicated freezer to keep it fresh. If that's not possible, wrap it up tight to prevent any leaks!
Remember, lobsters are nocturnal, hunting at night. So, bait placement in your traps is key. Place it in the parlor, where lobsters are most likely to find it. Engaging in recreational lobstering fosters a deeper appreciation for the marine ecosystems that support these delicious crustaceans.
Choosing the right bait means you'll have a great chance of catching those delicious crustaceans! Enjoy your adventure!
Regulations for Lobster Fishing
Understanding the regulations for lobster fishing is essential for anyone looking to harvest these delicious crustaceans legally and sustainably.
First, if you want to fish commercially, you need a federal lobster limited access permit. This permit must be renewed every year by April 30, so don't forget! For recreational lobster fishing in Massachusetts, a special permit is also required.
When it comes to gear, some items are strictly prohibited. You can't use spear guns, dipnets, or any kind of dredges. Make sure your buoy line is no thicker than 5/16". Plus, avoid letting your gear sit in the water for more than 30 days. It's also important to note that the lobster trap season runs from May 16 to October 31 for recreational fishing.
You'll also have to follow catch limits. In Massachusetts, you can keep up to 15 lobsters per day, but remember, they must be between 3 1/4" and 5" in size. Any undersized, oversized, or v-notched females need to go back into the water.
Lastly, the recreational lobster season runs from May 16 to October 31. Enjoy your time on the water, but be sure to follow the rules to help protect our precious lobster populations!
Differences Between Commercial and Recreational
Lobster fishing varies significantly between commercial and recreational practices, each with its own set of rules and methods. If you're a recreational lobster enthusiast, you'll likely use traps or pots to catch these delicious crustaceans. You can even try hand-fishing or spearfishing for a fun twist! It's usually just you or a small group enjoying some quality time on the water. Additionally, it's worth noting that there are approximately 35,000 species of crustaceans identified globally, which highlights the diversity of marine life you may encounter while fishing.
On the other hand, commercial lobster fishing is a whole different ball game. It involves larger vessels and sophisticated gear, like gill nets and trawls. Commercial fishermen often operate in teams, targeting a variety of lobster species on a much larger scale. They face higher costs too, because of the expensive equipment and more extensive operations.
While both types of fishing require some investment, recreational lobstering can be a bit more budget-friendly. You might spend on traps, gas, and other supplies, but it's generally less than what a commercial operation needs.
The thrill of catching lobsters is what makes both experiences special, whether you're doing it for fun or business! So grab your gear, and let's get lobster fishing!
Proper Handling Techniques
How do you ensure your lobsters stay safe and healthy from the moment you catch them? First, keep those rubber bands on their claws! This simple step prevents them from pinching each other and keeps everyone safe.
When you pick up a lobster, hold it by the lower end of the body shell, allowing the head and claws to hang down. Remember, one hand, one lobster! This way, you avoid any accidents. Live lobster remains viable for 36-40 hours outside water in cool, damp conditions, so be mindful of the time you're handling them.
Always be careful of the sharp edges on the lobster's tail. When it's time to store your lobsters, refrigerate them right away. Use damp newspaper or fresh seaweed in the coldest part of your fridge. It's important not to remove the rubber bands until you're ready to cook.
Never place live lobsters in fresh water, salt water, plastic bags, or freezers. They need to breathe, so if it's too warm, you can use melted ice to help them cool down.
Processing Your Catch
After ensuring your lobsters are healthy and safely handled, the next step is processing your catch to get the most out of each crustacean.
First, you'll need some handy tools: nutcrackers or specialized lobster crackers to break open the claws, kitchen shears to cut through the shell, and a seafood pick to extract the delicious meat.
Start by twisting off the tail from the body and removing the claws. Be careful—lobster meat can be delicate! Use the nutcracker to crack open the claws, and run the tail under cold water to help with meat extraction. It's easier than it sounds!
One challenge is that roasted lobster meat can stick to the shell, making it tricky to remove. To avoid this, try to process your lobsters soon after cooking. Additionally, consider that using High Pressure Processing (HPP) can enhance meat extraction efficiency and improve safety.
Lay your cutting board on a shallow pan to catch any juices. And remember, if you're feeling adventurous, consider using High Pressure Processing (HPP) for a more efficient way to get all that tasty meat out!
Enjoy the process, and soon you'll have a feast of delicious lobster ready to be cooked and savored!
Tips for Successful Lobster Fishing
When it comes to successful lobster fishing, preparation is key. First, gather your gear! You'll need a bait bag filled with herring to attract those delicious crustaceans. Don't forget your buoy to mark where your traps are located. Each buoy should have a unique color so you can easily spot your traps in the water.
When setting your traps, lower them to the ocean floor in waters between 15 to 1,000 feet deep. Attach your buoy securely to the trap line. Check your traps every few days, as this helps you catch more lobsters. Remember to approach the buoys from the stern of your boat to avoid any tangled lines!
Once you pull up your traps with a pot hauler, inspect your catch. Use a gauge to measure the lobsters, ensuring they meet size regulations. Be sure to handle them carefully and use a banding tool to secure their claws. Additionally, consider implementing strict regulations on lobster fishing to help maintain sustainable populations.
If you catch any female lobsters with a v-notch, release them back into the water to help conserve the population.
With these tips, you're all set for an exciting and successful lobster fishing adventure! Happy fishing!
Frequently Asked Questions
What Is the Best Time of Year to Catch Lobsters?
The best time to catch lobsters is from late summer to early fall, especially between June and September.
During this peak season, lobsters are more active and closer to shore, making them easier to trap.
You'll find soft-shell lobsters, which are sweeter, and hard-shell lobsters become plentiful later in the fall.
How Can I Find Lobster Fishing Spots Near Me?
To find lobster fishing spots near you, start by checking local maps and guides.
Look for areas with rocks, reefs, and mangroves, since lobsters love hiding there.
Ask local fishermen for tips or join community groups online to share ideas.
You can also explore tide charts to plan your trips, especially around sunset.
Don't forget to check local regulations before you go, so you're all set for a fun lobstering adventure!
Are There Specific Licenses Required for Lobster Fishing?
Yes, you need specific licenses for lobster fishing!
If you're fishing in federal waters, you'll require a federal lobster limited access permit.
In state waters, like in Connecticut or Massachusetts, you'll need a commercial lobster pot fishing license.
For personal fishing, a non-commercial license is necessary.
Don't forget to check local rules too, as they can have different requirements.
Always make sure your permits are current to enjoy a successful fishing adventure!
What Are the Signs of a Healthy Lobster Population?
A healthy lobster population shows several exciting signs!
First, you'll notice high numbers of lobsters in the ocean, often over 256 million.
You'll also see a good mix of juvenile lobsters and adults, which means they're breeding well.
Plus, if traps are mostly full, that's a great sign!
Finally, a stable environment with plenty of habitat helps lobsters thrive.
All these factors together mean a happy and healthy lobster community!
Can I Fish for Lobsters From Shore?
Yes, you can fish for lobsters from shore! It's a fun adventure that requires a few important things.
First, get a valid saltwater fishing license with a lobster tag. You'll also need some gear like a mask, snorkel, and a lobster net.
Look for shallow waters and rocky spots where lobsters like to hide.
Remember to follow local rules about size limits and conservation to keep our oceans healthy and happy!
Conclusion
Now that you know the ins and outs of lobster fishing, you're ready to dive in! With the right equipment, bait, and techniques, you can enjoy the thrill of catching these tasty crustaceans. Remember to follow the rules and handle your catch carefully. Whether you're out for fun or to fill your dinner plate, lobster fishing can be an exciting adventure. So grab your gear, head out to the water, and make some unforgettable memories!
Spearfishing
Free Diving Fins That Propel You Faster: Are You Missing Out?
Inefficient fins could be holding you back from achieving incredible speeds underwater—discover the secrets that could transform your freediving experience!
If you want to zoom through the water like a fish, choosing the right freediving fins is key! Longer fins can give you more power, while materials like carbon fiber help you jet through the waves. Stiffer fins need stronger leg muscles, but softer ones are perfect for beginners. Don't forget to make sure the foot pockets fit snugly—too tight or too loose can slow you down. Whether you go for monofins or bi-fins, the right choice can really amp up your speed and fun. Isn't it exciting to imagine how fast you could be going? Stick around to find out more!
Key Takeaways
- Longer fins increase surface area, providing enhanced propulsion for faster movement through the water, ideal for experienced divers.
- Stiffer fins maximize energy transfer during kicks, offering more power for stronger divers while requiring greater leg strength.
- Carbon fiber fins deliver superior stiffness and responsiveness, enabling powerful propulsion and improved efficiency for deep dives.
- A snug fit in foot pockets optimizes energy transfer, reducing power loss and enhancing overall diving performance.
- Monofins allow for streamlined dolphin kicks, significantly improving speed and reducing effort, making them ideal for advanced diving techniques.
Understanding Fin Length and Design
When it comes to free diving fins, understanding fin length and design is crucial for optimizing your underwater experience.
You'll notice that freediving fins usually measure between 31 and 38 inches long. This extra length gives you a bigger surface area, allowing you to push more water and get a powerful 'snap' with every kick! Longer fins are perfect for deeper dives and longer swims because they're designed for maximum propulsion and efficiency. Additionally, these fins provide greater propulsion efficiency compared to standard snorkeling fins, which enhances your overall diving experience.
The design of the fin blade plays a big role too! It's thicker and harder near your foot, becoming softer at the tip. This graded structure helps convert your energy into powerful kicks while requiring less effort. You'll glide through the water like a fish!
If you're a beginner, you might prefer softer fins, which are easier on your legs, while stronger divers might want stiffer fins for that extra power.
Material Choices for Efficiency
Choosing the right material for your free diving fins can significantly impact your efficiency and performance underwater. When you think about fins, carbon fiber often comes to mind first.
These fins are known for their stiffness and responsiveness, which means every kick you take sends energy directly into the water, giving you powerful propulsion. Plus, they're lightweight, so you won't tire out quickly on your dive! Carbon fiber fins exhibit high modulus of elasticity, resisting bending, ensuring that your kicks translate into maximum thrust.
Fiberglass fins are another option, offering more flexibility than carbon fiber. While they can feel a bit sluggish, they've a nice reactive snap that helps you move with less effort.
They're great for open water and intermediate divers, but they mightn't be the best choice for deep dives.
If you're on a budget, plastic fins are the most affordable option. However, they lack the advanced features of pricier materials, making them less efficient.
Composite fins blend different materials, striking a balance between performance and cost. They're perfect for divers who want a mix of efficiency and comfort.
Balancing Flexibility and Stiffness
Finding the right balance between flexibility and stiffness in your free diving fins is crucial for optimizing your underwater performance.
You see, stiffer fins can give you more power, but they also require strong leg muscles to use them effectively. If you're on the lean side, you might want softer fins, while those with more muscle can handle medium to hard stiffness.
For example, if you weigh between 50-75 kg, soft fins will be your best friend. But if you weigh over 100 kg, hard fins might be what you need to propel yourself through the water like a dolphin! Additionally, longer fins can enhance water displacement, allowing for even greater power with each stroke.
Now, think about your diving technique—if your fins are too stiff or too soft, you could end up working harder than necessary, which isn't fun at all.
Also, if you're diving in strong currents, medium stiffness fins can help you keep up the pace.
Importance of Foot Pocket Comfort
Although foot pocket comfort may seem secondary, it significantly impacts your overall diving experience and performance. When you slip your feet into fins, a snug fit is crucial. If there's any gapping or movement, you lose energy with every kick, which isn't what you want when you're gliding through the water like a fish!
You must pay attention to how your foot pockets feel. A snug fit prevents pesky blisters and hot spots, ensuring you can dive longer without discomfort. Too small, and you'll feel cramps; too big, and you'll lose power. Imagine your heel slipping out every time you flex your foot—talk about annoying!
The materials also matter! Softer rubber foot pockets feel like cozy slippers on your feet but might wear out faster. On the other hand, harder rubber lasts longer but can pinch a bit. So, striking that balance is key! Additionally, proper selection of materials can significantly extend the lifespan of your fins.
Lastly, think about water temperature. If you're diving in colder waters with thicker socks, you may need a larger foot pocket size.
Comparing Monofins and Bi-fins
When you're deciding between monofins and bi-fins for your freediving adventures, understanding their differences can enhance your underwater experience.
Monofins are like a dolphin's tail, helping you glide through the water super fast! They use a special kick called the dolphin kick, which means your whole body works together to zoom down. If you're aiming for deep dives or trying to break records, monofins are your best buddy. In fact, they can improve your distance by 15%-40% with less effort.
On the other hand, bi-fins are like having two separate flippers for each foot. This makes them great for turning and moving around easily, perfect for fun recreational dives or spearfishing. Bi-fins let you kick with a flutter kick, which is a lot simpler to learn and gives you a natural feel underwater.
If you're planning to swim long distances at the surface or want to sneak around tight spots, bi-fins are the way to go. Plus, they're easier to put on and take off, so you can spend more time enjoying the water and less time fussing with your gear.
Customization and Practical Considerations
Customization is key in choosing the right freediving fins, as it allows you to tailor your gear to fit your specific needs and diving goals.
Imagine being able to swap out the blades on your fins! Blade exchangeable fins let you do just that, adapting to different conditions like a superhero changing costumes. You can also pick materials—like carbon fiber or rubber—to match your performance desires and budget.
When it comes to stiffness, you have options too! Stiffer fins give you a power boost for deep dives, while softer fins are easier on your legs for leisurely swims. The type of fin you choose should align with your diving style consideration to ensure optimal performance and enjoyment.
If you're just starting out, softer fins can be your best pals, reducing strain and fatigue. Plus, some fins even offer adjustable features, making them comfy and snug for various foot sizes.
Enhancing Your Freediving Experience
Finding the right freediving fins goes beyond customization; it's about enhancing your entire experience underwater. When you choose fins that fit well and work efficiently, you can glide through the water like a dolphin!
You'll want to focus on proper fin technique, which means using fins that bend just right. If they bend too much and stall, you'll waste energy instead of zooming along. Mastery of bi-finning technique significantly contributes to achieving optimal propulsion and efficiency.
Long blade fins, often called the "Ferraris" of the sea, are fantastic for propulsion. Made from stiff materials like carbon, they help you move forward with less effort.
But remember, it's not just about the fins; it's also about how you use them! Keep your kicks straight and avoid unnecessary movements. This way, you'll reduce the urge to breathe and feel more relaxed while diving.
Lastly, find fins that match your strength. If you're a lean diver, softer fins work best. Compact and lightweight fins also make traveling easier, so you can take your adventures anywhere!
With the right fins and technique, you'll be ready to explore the underwater world like never before!
Frequently Asked Questions
How Do I Choose the Right Fin Size for My Foot?
Choosing the right fin size is super important for your comfort and performance!
First, try on the foot pockets while standing, so you get a real feel. If you wear neoprene socks, go one size up.
Make sure they're snug but not too tight—no one likes blisters! A good fit lets your feet move freely.
Just remember, when you find the right size, you'll swim like a fish in no time!
Can I Use My Scuba Fins for Freediving?
You can use your scuba fins for freediving, but they mightn't give you the best experience.
Scuba fins are shorter and designed for heavy gear, while freediving fins are longer and help you glide through the water more efficiently.
If you want to maximize your speed and minimize fatigue, investing in freediving fins is a smart choice.
What Is the Lifespan of Different Fin Materials?
The lifespan of fin materials varies quite a bit!
Plastic fins usually wear out quickly because they bend and lose their shape.
Fiberglass fins last longer since they're tougher, but they can still show wear over time.
Now, carbon fins are the champions—they're super durable and keep their shape, giving you a long-lasting experience!
So, when choosing, think about how often you dive and your budget.
Happy diving!
Do Fins Affect My Buoyancy Underwater?
Yes, fins do affect your buoyancy underwater! While they don't directly change how buoyant you are, they help you move smoothly, which makes it easier to stay at your desired depth.
When you kick with your fins, you can control your position better and reduce the energy you use.
Plus, the right fins can make it way more fun to explore the underwater world, like a playful dolphin! So, choose wisely!
How Often Should I Replace My Freediving Fins?
You should check your freediving fins regularly!
If you notice cracks, bends, or worn-out foot pockets, it's time for a replacement. Fins can wear out faster if you dive often or in tough conditions, like rocky waters.
If you've been using them a lot, aim to replace them every one to two years.
Taking good care of your fins, like rinsing them after each dive, can help them last longer—happy diving!
Conclusion
So, whether you're zooming through the water with monofins or gliding gracefully with bi-fins, the right fins can make a big difference in your freediving adventures! Remember to think about fin length, material, and comfort, because they help you swim faster and enjoy your time underwater even more. So, grab your fins, dive in, and have a blast exploring the magical underwater world! You're just a kick away from an amazing experience!
Spearfishing
How to Spearfish: Your Beginner’s Blueprint to Underwater Hunting Glory!
Dive into spearfishing with our beginner’s blueprint and discover the secrets to underwater hunting success—your first catch awaits!
Spearfishing is a thrilling way to explore the underwater world! Start by choosing a safe diving spot, free from strong currents. Get the right gear, like a rubber-powered speargun and a comfy wetsuit, to keep you warm and secure. Always dive with a buddy for safety. When you're in the water, look for fish hiding among rocks or seaweed and approach quietly. Remember to practice your breath-holding skills on the surface for better dives. With these tips, you're ready to make your first catch! There's so much more to learn, so keep going for more exciting insights!
Key Takeaways
- Choose safe diving locations with minimal currents and hazards, ensuring a comfortable environment for beginners.
- Equip yourself with essential gear like a speargun, wetsuit, mask, and fins, investing in quality for effectiveness.
- Always follow the buddy system for safety; never dive alone and ensure proper communication underwater.
- Practice stealth and control your breathing while diving to approach fish quietly and minimize disturbances.
- Train regularly for breath-holding and improve your diving skills through consistent practice and proper techniques.
Understanding Spearfishing Basics
Understanding the basics of spearfishing is crucial, especially since your safety and success depend on it. First, you need to know where to dive. Choose areas protected from strong waves and currents. This helps keep you safe while you search for fish. Be on the lookout for sharks, seals, and other predators. Avoid diving where there are many dangerous fish or jellyfish, as some can sting!
Next, master your dive techniques. Start in shallow waters to get comfortable with your speargun. When you're ready, use hidden spots like reefs to surprise fish. Always enter the water with your speargun unloaded for safety. Practice diving with a buddy, especially if you go deeper than six meters. Remember that health and safety are paramount; if unable to comply, it's best to avoid spearfishing altogether.
Finally, keep in mind some safety precautions. Never point your speargun at something you don't want to shoot. Use the safety catch until you're ready to take a shot. Remember to handle the sharp spear carefully, and avoid loading your gun out of the water.
Essential Gear for Beginners
Equipping yourself with the right gear is essential for a successful spearfishing experience. First, you'll need a speargun. For beginners, a rubber-powered gun between 45 cm and 75 cm is perfect. These smaller guns are great for catching fish close to shore. The Cressi Apache Speargun is a popular choice!
Next, don't forget a wetsuit. A 3mm wetsuit keeps you warm and costs around $100. Pair it with spearfishing gloves for grip and protection, which are about $30. A well-fitting wetsuit is necessary to combat cold water and protect from hazards.
A mask and snorkel set is also a must-have for clear vision and easy breathing, costing around $20-$25. You'll want some diving fins, too. Quality freediving fins help you swim efficiently and cost about $120.
A weight belt and weights help you control your buoyancy, which is vital while diving. These usually cost around $120 as well. Lastly, consider getting a dive flag and float to signal your presence in the water.
This gear, costing about $50, helps keep you safe and visible. With this essential gear, you're ready to dive into the thrilling world of spearfishing!
Safety Tips for Spearfishing
Diving into the world of spearfishing can be exhilarating, but safety should always be your top priority. Always dive with a buddy, especially if you're going deeper than 6 meters. Diving alone can be risky, particularly around wrecks.
Make sure only the person in front has their speargun loaded. Keep an eye on your buddy's position so you both stay safe. Proper weight management through the use of a weight belt helps ensure you can dive safely and efficiently.
Before you dive, check your gear. Never load your speargun while out of the water, and always clean it with fresh water after each session.
Use the safety catch until you're ready to shoot, and be careful to protect the spear tip from damaging boats or other surfaces.
Watch out for marine life, too! Fish like weaver fish can sting, and you should avoid old nets or traps when diving. If you see a shark, calmly change locations.
You don't want to accidentally shoot an unintended fish, so always check what's behind your target.
Lastly, carry safety items like flares and a mobile phone, and use a float-line to keep your speargun safe.
If conditions get rough, don't hesitate to end your dive and find a safer spot. Enjoy your adventure, but always prioritize safety!
Effective Spotting and Shooting Techniques
How can you enhance your chances of success while spearfishing? Start by being aware of your surroundings. Knowing where fish like to hide—like under rocks, in caves, or around seaweed—can give you a big advantage. Fish often blend in, so look for areas with algae or moss where they feel safe.
Next, consider your appearance. Wearing a camouflage wetsuit helps you blend in, making it harder for fish to spot you. Stay in shadowy areas and avoid eye contact with the fish, as they can sense you watching them.
When you approach, do it quietly. Make a splash-free entry and glide smoothly, using your hands to pull yourself along the seabed instead of kicking. Control your breathing to keep bubbles to a minimum. Remember that stealth is crucial for maintaining proximity to your targets.
Finally, use distractions to draw fish closer. Creating a cloud of sand or using bait can make curious fish come your way. Position yourself wisely, and wait patiently for that perfect moment to take your shot.
With these effective spotting and shooting techniques, you're well on your way to spearfishing success!
Improving Diving Skills and Breath Holds
Improving your diving skills and breath holds is essential for successful spearfishing. Start by practicing breath-hold techniques like static and dynamic apnea. Static apnea means holding your breath while staying still, while dynamic apnea involves swimming. It's best to train in a pool with supervision to stay safe. Additionally, understanding local regulations can help you plan your dives more effectively and responsibly.
You can also try yoga and meditation to help you hold your breath longer. Remember, avoid over-breathing, as it can flush out too much CO2 from your body.
Regular practice is key! Engage in breath-hold exercises often to build your diving endurance. Daily lung expansion exercises can really help. Make sure you spend time getting comfortable in the water so you can stay underwater longer.
When you dive, breathe on the surface for at least twice the time you hold your breath.
Always dive with a buddy for safety. Know the local waters and watch for strong currents or any sea creatures. Learning how to equalize and fin properly is also important.
Frequently Asked Questions
What Is the Best Time of Day to Go Spearfishing?
The best times to go spearfishing are early morning and late afternoon.
At these times, you'll find better visibility and fewer people around, which means fish are more likely to be active.
Try to plan your trips about two hours before high tide, too, as the water will be calmer.
Remember, good visibility is key, so keep an eye on local conditions.
Happy hunting, and enjoy your underwater adventure!
How Do I Choose the Right Speargun for Beginners?
Choosing the right speargun as a beginner can be exciting!
Start with a pole spear; it's simple and budget-friendly. If you want something a bit more advanced, look at entry-level spearguns around 90-110cm. They're versatile for different fish.
Consider materials too. Stainless steel is durable, while timber offers better tracking.
Don't forget about the handle! An ergonomic one will make your spearfishing adventure more enjoyable and comfortable.
Happy hunting!
What Types of Fish Are Easiest to Catch as a Beginner?
As a beginner, you'll find fish like bream, luderick, and sweetlip are the easiest to catch.
They often swim slowly in shallow waters, making them perfect targets. Look for them near rocky areas or reefs, where they love to hide.
These fish aren't too shy, which means you can sneak up on them.
Are There Specific Regulations for Spearfishing in My Area?
To find the specific regulations for spearfishing in your area, start by checking local and state laws.
You'll need to get the necessary licenses and permits.
Don't forget to look for rules about protected species and size limits, too!
It's important to know where you can and can't spearfish, like avoiding public beaches and protected zones.
Following these guidelines keeps you safe and helps protect our amazing underwater ecosystems!
How Can I Improve My Underwater Visibility While Spearfishing?
To improve your underwater visibility while spearfishing, time your dives during slack tides when the water's calm.
Early mornings or late afternoons often provide clearer views.
Use a shorter speargun in murky water to get closer to your target.
A well-fitting mask and snorkel can make a big difference, too!
Remember to move slowly and quietly, avoiding sediment disturbance.
Lastly, look for natural cover like rocks or seaweed to help you blend in.
Conclusion
Now that you know the basics of spearfishing, it's time to dive in and have fun! Grab your gear, stay safe, and practice your skills. Remember, spotting fish takes patience, but with practice, you'll get better. Enjoy the thrill of underwater hunting and the beauty of the ocean. Each trip is a new adventure, so don't hesitate to explore. Soon, you'll feel the joy of catching your first fish. Happy spearfishing!
-
Vetted6 months ago
15 Best Wilderness Survival Fiction Books to Fuel Your Adventurous Spirit
-
Foraging Guides6 months ago
Are Forage Internships Worth It? Here's What You Need to Know!
-
Coastal Foraging6 months ago
How to Dry Age a Fish? The Ultimate Guide for Seafood Lovers
-
Coastal Foraging6 months ago
15 Best GMRS Radios for Preppers: Stay Prepared and Connected in Any Situation
-
Vetted6 months ago
15 Best Wilderness Survival Books Every Outdoor Enthusiast Must Read
-
Coastal Foraging6 months ago
15 Best Baofeng Radios for Preppers – Stay Connected in Any Situation
-
How to Forage6 months ago
Virginia’s Wild Harvest: Forage for Delicious Edibles!
-
Vetted6 months ago
6 Best Wilderness Survival Games for Ios to Test Your Skills in the Wild