

To maximize ice retention, start by pre-chilling your cooler for several hours with ice or ice packs. This lowers the internal temperature, slowing heat transfer when you add more ice or drinks later. Good insulation and minimizing openings also help keep cold air in. Think of it like giving your cooler a head start in staying cold. Keep going to discover more tips for making your ice last even longer.

Get garden gear delivered free — and shop member deals
- Fast, free delivery on millions of items
- Access to Prime Big Deal Days deals on October 6–7
- Prime Video, Amazon Music and more included
Key Takeaways
- Pre-chilling the cooler lowers its internal temperature, reducing initial heat transfer when adding ice.
- Filling the cooler with ice or ice packs for hours before use maximizes cooling efficiency.
- Proper insulation, like foam or polyurethane, minimizes external heat transfer and prolongs ice life.
- Keeping the cooler in shaded areas and limiting openings prevents warm air from entering.
- Combining pre-chilling with good insulation and minimal access significantly extends ice retention.
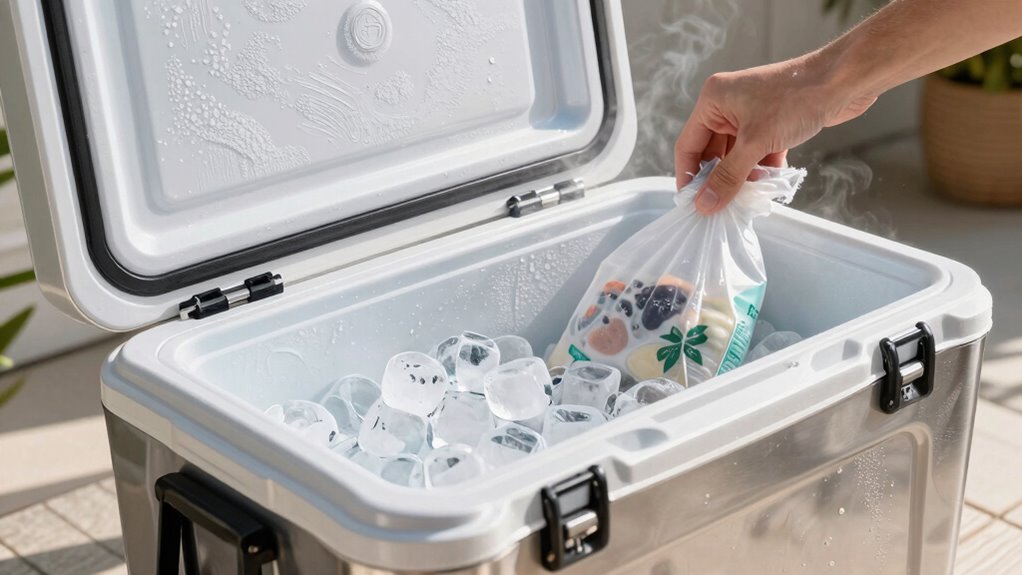
Have you ever wondered how to keep ice from melting too quickly? It’s a common challenge, especially when you’re trying to keep drinks cold during a long day outdoors or at a party. The secret lies in understanding ice melting and how container insulation plays a crucial role. When you place ice into a cooler, it’s not just about the ice itself but how well your container prevents heat transfer. The better your cooler’s insulation, the slower your ice will melt, helping you maintain cold temperatures longer. But there’s a simple trick that can make a real difference: pre-chilling your cooler before adding ice.
Pre-chilling involves cooling your cooler beforehand, ideally by filling it with ice or ice packs for a few hours before use. This process reduces the internal temperature of the container, which means when you add fresh ice, it doesn’t immediately start melting due to the warmer container walls. Think of it as giving your cooler a head start in the race against heat. When you put cold items into a pre-chilled container, the temperature difference is minimized, and the ice melts at a slower rate. This simple step makes your ice last much longer because it reduces the initial heat transfer that kicks off melting. Additionally, understanding heat transfer principles can help you optimize your cooling strategy even further. Knowing how heat transfer occurs allows you to choose the best materials and methods to keep your ice frozen longer. Recognizing thermal conductivity in your cooler’s materials can guide you in selecting the most effective options for insulation. Moreover, selecting a cooler with proper insulation quality can significantly extend the duration your ice remains solid. Ensuring proper air circulation inside the cooler can also prevent warm spots that accelerate melting.
Pre-chilling your cooler slows ice melting by reducing initial heat transfer, helping your ice last longer during outdoor activities.
Container insulation is another vital factor. Not all coolers are created equal, and those with thicker walls and high-quality insulation keep cold in and heat out more effectively. When shopping for a cooler, look for models with foam or polyurethane insulation, which act as barriers to heat transfer. Once you’ve pre-chilled your cooler, the insulation does the rest of the work by maintaining that lower temperature. The better the insulation, the less your ice will be exposed to external heat, thus prolonging its lifespan.
To maximize ice retention, combine pre-chilling with other best practices. Fill your cooler with as much ice as possible—more ice means less room for warm air to circulate. Wrap your drinks in towels or insulation blankets for extra protection. Keep the cooler in the shade and avoid opening it frequently, which lets warm air in. All these steps work together, but starting with a pre-chilled, well-insulated container gives you a significant advantage.
In the end, managing ice melting boils down to controlling heat transfer. Pre-chilling your cooler and choosing one with good container insulation are two simple yet effective ways to extend the life of your ice. By doing so, you’ll keep your drinks colder, longer, and enjoy your outdoor activities without constantly worrying about melting ice.
pre-chilled cooler with ice packs
As an affiliate, we earn on qualifying purchases.
As an affiliate, we earn on qualifying purchases.
Frequently Asked Questions
How Long Should I Pre-Chill My Cooler Before Use?
You should pre-chill your cooler for at least 24 hours before use. Fill it with ice blocks to help maintain a low temperature and guarantee effective temperature control. This pre-chill process helps stabilize the internal environment, so your items stay colder longer. The longer you pre-chill, the better the ice retention, especially on hot days. Make sure to empty excess water before packing your items for peak results.
Does the Type of Ice Affect Retention Time?
Yes, the type of ice affects retention time. Ice composition and temperature consistency matter—big time. For example, larger blocks or dense ice last longer than small cubes because they melt slower and maintain a consistent temperature. Using high-quality, dense ice helps keep your cooler colder longer, ensuring your items stay fresh. So, choose your ice wisely based on these factors to maximize retention and enjoy longer-lasting coolness.
Can Pre-Chilling Damage the Cooler Material?
You might worry that pre-chilling could damage your cooler material, but it’s unlikely if you use proper techniques. Pre-chilling won’t harm the cooler, regardless of its material, as long as you avoid freezing it solid or using excessive force. The key is to use ice with the right composition, like ice blocks or crushed ice, which helps keep your cooler in top shape without risking damage.
What’s the Best Way to Pre-Chill Quickly?
To pre-chill quickly, fill your cooler with ice packs and let them sit for about an hour. The ice packs, when placed against the insulation material, absorb heat efficiently, lowering the cooler’s interior temperature. Make sure the insulation material is dry and intact to maximize efficiency. You can also pre-chill empty cooler overnight for even better results, ensuring your food stays cold longer during your trip.
How Often Should I Add Ice During Extended Use?
You should add ice as needed, typically every 1-2 days during extended use, depending on your cooler’s conditions. Keep in mind, proper ice placement helps maximize retention—spread it evenly and layer it with contents. Regular cooler maintenance, like cleaning and ensuring proper insulation, also prevents ice from melting too quickly. Monitoring the temperature and adjusting your ice supply accordingly will keep your items cold longer.
high insulation cooler for outdoor activities
As an affiliate, we earn on qualifying purchases.
As an affiliate, we earn on qualifying purchases.
Conclusion
By mastering the cooler ice retention basics, you’ll keep your chill for longer, leveraging the pre-chill trick to maximize ice’s magic. Remember, proper preparation prevents poor performance—pre-cool your cooler and pack it properly. With these simple steps, you’ll savor sustained, icy freshness on every adventure. So, stay savvy, stay chilled, and let your cooler’s coolness conquer the heat, creating a perfect, prolonged party of preservation—peaceful, pristine, and perfectly cooled.
As an affiliate, we earn on qualifying purchases.
As an affiliate, we earn on qualifying purchases.
Fall Picks
fall essentials
As an affiliate, we earn on qualifying purchases.